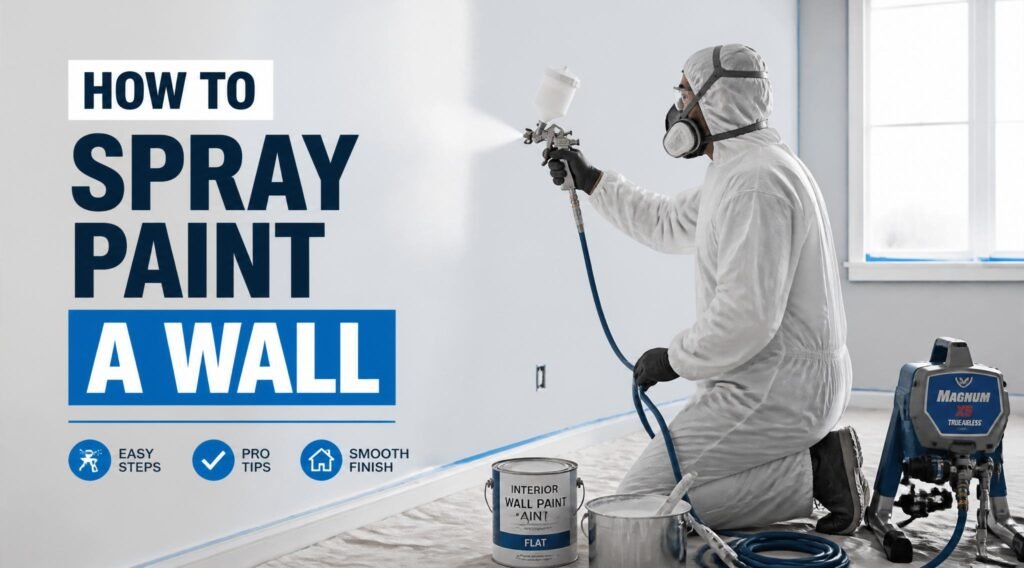
How to Spray Paint a Wall: Complete Step-by-Step Guide for a Flawless Finish
By Rodney | Techniques & Tutorials | Updated: June 2026
Learning how to spray paint a wall is one of the most useful skills any DIYer or home improvement enthusiast can develop. Whether you want to refresh a tired bedroom, repaint a garage interior, or refresh your home’s exterior, spray painting delivers a smooth, professional finish far faster than rolling or brushing — once you know how to do it correctly.
The problem is that most people who try spray painting a wall for the first time end up with drips, uneven coverage, overspray on the ceiling, or a patchy mess they have to redo. None of those problems are caused by spray painting being hard. They happen because the preparation was wrong, the technique was off, or the wrong product was used.
This guide covers everything — from choosing the right sprayer and paint, to taping and protecting surfaces, to the correct spraying motion, to fixing mistakes — so your wall comes out smooth, even, and looking like it was done by a professional.
Table of Contents
- Why Spray Paint a Wall Instead of Rolling?
- What You Need Before You Start
- How to Choose the Right Spray Paint or Sprayer for Walls
- Step-by-Step Wall Preparation
- How to Mask and Protect Surrounding Areas
- How to Spray Paint a Wall: The Core Technique
- How Many Coats Does a Wall Need?
- Drying Times and When to Apply the Next Coat
- Common Mistakes When Spray Painting Walls (And How to Fix Them)
- Indoor vs Outdoor Wall Spray Painting: Key Differences
- Frequently Asked Questions
1. Why Spray Paint a Wall Instead of Rolling?
Before diving into technique, it’s worth understanding why someone would choose to spray paint a wall rather than use a roller — which is what most homeowners are familiar with.
Speed is the biggest reason. A paint sprayer can cover a standard bedroom wall in minutes. A roller covering the same area takes significantly longer, especially when you factor in multiple coats and drying time between passes.
Finish quality is the second reason. A properly applied sprayed finish has no roller texture, no lap marks, and no brush strokes. It produces the kind of smooth, even coverage you see in freshly built show homes — because that’s exactly how professional painters and builders achieve it.
Awkward areas also respond better to spray painting. Textured walls, brick walls, wood panelling, built-in shelving, and intricate mouldings are difficult or impossible to roll smoothly. A sprayer covers all of these surfaces evenly and quickly.
The tradeoff is preparation time. Spray painting requires more masking, more covering of adjacent surfaces, and more controlled technique. But once you know the process, the prep becomes second nature, and the speed and finish quality make it worth the effort every time.
2. What You Need Before You Start
Having the right equipment ready before you start will make everything faster, safer, and more likely to produce a great result.
Equipment checklist:
- Paint sprayer (HVLP sprayer for indoor walls, airless sprayer for large exterior areas)
- Appropriate wall paint (latex/water-based for indoors, exterior-formula for outside)
- Painter’s tape (2-inch width recommended)
- Plastic sheeting or dust sheets (for floors, furniture, and adjacent surfaces)
- Drop cloths
- Sandpaper (120-grit for surface prep)
- Primer (if painting over bare drywall, dark colours, or previously stained surfaces)
- Respirator mask rated for paint fumes (P100 or OV/P100 combination)
- Safety goggles
- Latex or nitrile gloves
- Stir sticks and a paint strainer
- A bucket or paint reservoir for the sprayer
Safety note: Never skip the respirator when spray painting indoors. The fine atomised particles produced by a paint sprayer are small enough to bypass the nose and mouth defences that protect you from brush or roller fumes. A proper respirator — not a dust mask — is essential. For more on staying safe while spray painting, read our full guide: Spray Painting Safety: Everything You Need to Know to Stay Safe.
3. How to Choose the Right Spray Paint or Sprayer for Walls
Choosing the right tool and the right product is critical when learning how to spray paint a wall. Using the wrong sprayer or the wrong paint formula causes most of the problems beginners experience.
HVLP Sprayers (High Volume Low Pressure)
HVLP sprayers are the best choice for most interior wall painting. They atomise paint at low pressure, which means less overspray, more control, and a finer finish. They work best with thinner paints — most latex wall paints work well once diluted approximately 10–15%.
Best for: Bedrooms, living rooms, hallways, and any interior wall where finish quality is the priority.
Airless Sprayers
Airless sprayers work at high pressure and move paint extremely quickly. They cover large surfaces faster than HVLP sprayers but produce more overspray and require more control to avoid drips. They are best for large exterior walls or commercial projects.
Best for: Exterior walls, garages, large surface areas where speed is the priority.
Aerosol Spray Cans
Aerosol spray cans are practical for small touch-ups, accent walls, or detail areas but are not suited for painting an entire wall. The cost per square metre is very high and the coverage is limited. For full wall painting, a sprayer is always more efficient.
What Type of Paint Works Best for Walls?
For interior walls, use latex (water-based) paint. It dries quickly, cleans up with water, has low fumes compared to oil-based options, and produces a durable finish. Choose the right sheen for your room:
- Flat/matte: Best for ceilings and low-traffic bedrooms. Hides imperfections well.
- Eggshell: Most popular for living rooms and bedrooms. Slight sheen, more washable.
- Satin: Good for kitchens, hallways, and higher-traffic areas. Easier to clean.
- Semi-gloss: Best for bathrooms, kitchens, and trim. Highly durable and moisture-resistant.
Not sure which type of spray paint formula to choose for your specific project? Read our guide on How to Choose the Right Spray Paint for Any Project for a detailed breakdown.
4. Step-by-Step Wall Preparation
Preparation is the part most people rush — and it’s exactly where most spray paint jobs fail. A well-prepared wall will produce a great result. A poorly prepared wall will produce problems that no amount of good technique can fix.
Step 1: Clear the Room
Remove as much furniture as possible from the room. What cannot be removed should be pushed to the centre and covered with plastic sheeting. Overspray from a paint sprayer travels further than most people expect, and it settles on every surface in the room if not protected.
Step 2: Clean the Wall
Walls accumulate dust, grease, and grime over time — especially in kitchens and near doorways. Paint will not bond properly to dirty surfaces. Wash the wall with a solution of warm water and mild detergent, then rinse with clean water and allow to dry completely. For greasy walls (common in kitchens), use a degreaser.
Step 3: Repair Surface Imperfections
Spray paint highlights surface imperfections rather than hiding them. Fill any cracks, holes, or dents with filler or joint compound, allow to dry, then sand smooth with 120-grit sandpaper. Feather the edges of the repair so it blends into the surrounding wall.
Step 4: Sand the Wall
Lightly scuff the entire wall surface with 120-grit sandpaper or a sanding block. This creates a slightly rough texture — called tooth — that helps the paint bond. It also removes any loose paint, high spots, or surface contamination that could cause adhesion problems.
Step 5: Wipe Down Dust
After sanding, wipe the wall down with a damp cloth or tack cloth to remove all sanding dust. Any dust left on the surface will be picked up by the wet paint and create a rough, gritty finish.
Step 6: Apply Primer (If Needed)
Primer is required when:
- Painting over bare drywall or plaster
- Changing from a dark colour to a significantly lighter one
- Painting over water stains or smoke stains
- Painting over new filler or repairs
Apply primer using the same sprayer technique described below for paint. Allow it to dry fully before applying your topcoat. For most standard repaint jobs where the existing wall colour is similar to the new colour, primer is optional but recommended for best adhesion.
5. How to Mask and Protect Surrounding Areas
Masking is not optional when spray painting a wall. A paint sprayer produces a fine mist that travels far beyond the spray pattern, and without proper masking, you will have paint on your ceiling, floor, skirting boards, window frames, and anything else in the room.
Key areas to mask:
- Ceiling line: Run painter’s tape along the top of the wall where it meets the ceiling. Press the tape firmly with a putty knife to ensure a clean edge.
- Skirting boards and baseboards: Tape the top edge of all skirting boards. Use tape-and-drape systems (tape with plastic sheeting attached) for speed.
- Window and door frames: Tape all edges carefully. Wrap door frames in plastic if the door is staying in the room.
- Electrical outlets and switches: Remove outlet covers if possible. If not, tape around them precisely.
- Floor: Cover the entire floor area adjacent to the wall with drop cloths or plastic sheeting. Secure the edges with tape to prevent the sheeting from shifting as you walk.
- Adjacent walls: If spraying one wall in a corner room, mask the adjacent walls at least 30cm (12 inches) back from the corner.
Pro tip: Use 3M ScotchBlue painter’s tape or equivalent quality tape. Budget tape bleeds paint under the edge and leaves residue. The time you save on masking with cheap tape is always spent fixing bleed-through later.
6. How to Spray Paint a Wall: The Core Technique
This is the heart of the guide — the actual spraying technique that produces a smooth, even, professional finish. Follow these steps precisely on your first few attempts until the motion becomes instinctive.
Set Up Your Sprayer
Fill the paint reservoir of your sprayer. Strain the paint through a paint strainer as you pour to remove lumps, which clog the nozzle. Dilute the paint if needed according to your sprayer manufacturer’s guidance — most HVLP sprayers require latex paint to be thinned by approximately 10–15% with water.
Adjust the spray pattern on your sprayer. For walls, use a horizontal fan pattern (wider side-to-side, narrower top-to-bottom). Set the flow rate to medium as a starting point — you can adjust from there.
Test spray on cardboard first. Before touching the wall, spray a test patch on cardboard or paper and check:
- The pattern is even with no heavy edges
- The paint atomises properly (no sputtering or spitting)
- The consistency is right (not too thin, not running)
- There are no clogs
The Correct Spraying Motion
The correct technique for how to spray paint a wall can be broken down into four principles:
1. Maintain consistent distance. Keep the sprayer tip 25–30cm (10–12 inches) from the wall surface at all times. Too close causes runs and drips. Too far causes dry, textured, or uneven coverage.
2. Keep the sprayer perpendicular to the wall. The spray tip should always point directly at the wall — not at an angle. Angling the sprayer causes uneven coverage and wet spots on one side of the spray pattern.
3. Move in steady, parallel strokes. Move the sprayer horizontally across the wall from one side to the other in a straight, level pass. Then come back in the opposite direction, overlapping each pass by approximately 50%. The overlap is critical — without it, you will have visible lines where each pass ended.
4. Trigger control: start moving before you spray, stop spraying before you stop moving. Start your arm motion, then press the trigger. At the end of each pass, release the trigger before stopping your arm motion. This prevents the paint from building up at the ends of each stroke — which is the most common cause of drips and heavy patches.
Working in Sections
Divide the wall into manageable sections — roughly 60–90cm (2–3 feet) wide. Work from top to bottom within each section, then move to the next. Working top to bottom means any overspray drifting down hits unfinished wall rather than fresh paint.
For a full wall from floor to ceiling, work in vertical sections. Start at one corner, spray from top to bottom in overlapping horizontal strokes, then move 60cm to the right and repeat. Each new section should overlap the previous one by approximately 10cm to avoid visible seams.
Keeping a Wet Edge
Unlike brushing and rolling, spray painting naturally maintains a wet edge as long as you keep moving at a consistent pace. Do not stop mid-wall and leave a section to dry — the edge where wet meets dry paint will be visible as a lap mark in the finished wall.
7. How Many Coats Does a Wall Need?
Most spray-painted walls need two coats of paint for even, full coverage. Some situations require three coats:
- Covering a significantly darker colour with a lighter one
- Using flat paint over a previously glossy surface
- Applying highly pigmented or specialty paints that are thinner
- Painting over repaired sections that were not properly primed
The first coat is called the build coat. It establishes coverage and reveals any problem areas. The second coat is the finish coat — it evens out any thin patches and delivers the final colour depth and sheen.
Do not try to achieve full coverage in one coat. Applying paint too heavily in one pass causes sags, runs, and drips that are difficult to fix. Two thin, even coats produce a far better result than one heavy coat.
8. Drying Times and When to Apply the Next Coat
Drying time between coats depends on the type of paint, the temperature, and the humidity level.
Latex paint (water-based):
- Touch dry: 30–60 minutes
- Recoat time: 2–4 hours
- Full cure: 7–14 days
Oil-based paint:
- Touch dry: 6–8 hours
- Recoat time: 24 hours
- Full cure: 7 days
Always follow the specific manufacturer’s instructions on the can. These timings are for normal conditions (around 20°C / 68°F and 50% humidity). In cold or humid weather, drying times extend significantly. Applying a second coat before the first is fully dry causes the new paint to disturb the first coat, resulting in streaks, texture, and adhesion problems.
If you are working in cold or damp conditions, our guide on How to Spray Paint Outdoors: Tips for Weatherproof Results covers how environmental conditions affect spray painting in detail.
9. Common Mistakes When Spray Painting Walls (And How to Fix Them)
Even with the best preparation and technique, mistakes happen — especially on the first few projects. Here is how to identify and fix the most common problems.
Drips and Runs
Cause: Sprayer held too close to the wall, moving too slowly, or flow rate set too high. Fix: Allow the drip to dry completely. Once dry, sand it smooth with 220-grit sandpaper, wipe off dust, and reapply paint with the correct technique.
Uneven or Patchy Coverage
Cause: Inconsistent distance from the wall, insufficient overlap between passes, or paint too thin. Fix: Apply an additional coat once the first is fully dry, paying close attention to maintaining a consistent distance and 50% overlap on every pass.
Orange Peel Texture
Cause: Paint too thick, not enough air pressure, or sprayer held too far from the wall. Fix: Thin the paint slightly, increase air pressure if your sprayer allows it, and reduce the distance. Sand the affected area once dry and respray.
Overspray on Ceilings or Adjacent Surfaces
Cause: Masking was inadequate or the spray fan pattern was too wide. Fix: Once dry, carefully scrape or wipe overspray from hard surfaces. On ceilings, lightly sand and touch up with ceiling paint.
Visible Lap Lines
Cause: Allowing one section to dry before overlapping into it, or insufficient overlap between passes. Fix: Once the entire wall is dry, sand the entire surface lightly with 180-grit paper and apply a fresh final coat with consistent, overlapping strokes and no pausing mid-wall.
For a complete breakdown of what goes wrong and how to fix it, read our dedicated troubleshooting guide: 10 Common Spray Paint Mistakes (And How to Fix Every One of Them).
10. Indoor vs Outdoor Wall Spray Painting: Key Differences
The technique for how to spray paint a wall is largely the same indoors and outdoors, but there are important differences in preparation, products, and conditions to be aware of.
Indoor Wall Spray Painting
- Ventilation is critical. Open all windows and doors. Use fans to push fumes out rather than circulating them through the room. Even with low-VOC paints, the atomised particles require airflow to disperse safely.
- Use latex/water-based paint for ease of cleanup, lower fumes, and faster drying.
- Protect everything. Overspray is more of a problem indoors because there is nowhere for it to drift except onto your furniture, floors, and ceilings.
- Temperature control is easier indoors — most interior environments are within the ideal painting temperature range of 10–30°C (50–86°F).
Outdoor Wall Spray Painting
- Check the weather. Do not spray paint in wind above about 10 mph — overspray will travel unpredictably and create uneven coverage. Do not spray in rain or humidity above 85%. Avoid direct hot sunlight, which causes paint to dry too quickly on the surface before it has bonded properly.
- Use exterior-formula paint. Exterior paints are formulated to withstand UV exposure, temperature swings, moisture, and mould. Interior paint used outdoors will fade, crack, and peel within months.
- Protect surrounding areas. Garden plants, pathways, driveways, windows, and doors all need protection from overspray when painting exterior walls.
11. Frequently Asked Questions
Can I use regular spray cans to paint a wall?
Aerosol spray cans are not practical for painting full walls. They are designed for small projects and detail work. The coverage area is limited, the cost per square metre is high, and maintaining consistent technique over a full wall is very difficult with a handheld can. For wall painting, an HVLP or airless sprayer is the right tool.
Do I need to prime before spray painting a wall?
Not always. If you are painting over an existing painted wall of a similar colour with a quality paint+primer formula, you may not need a separate primer coat. However, bare drywall, stained surfaces, dark-to-light colour changes, and new plaster all benefit significantly from a primer coat applied first. Priming also improves adhesion and ensures the topcoat colour appears true.
How do I clean a paint sprayer after use?
Clean your sprayer immediately after finishing — do not let paint dry inside the unit. For latex paint: flush the sprayer with clean water until it runs clear. For oil-based paint: flush with the appropriate solvent (mineral spirits or paint thinner). Disassemble the nozzle and filter and clean them separately. A properly cleaned sprayer lasts for years; a neglected one clogs and malfunctions quickly.
How do I get a smooth finish with a spray painter?
The three keys to a smooth finish are: proper paint consistency (thin enough to atomise correctly), consistent distance (25–30cm from the wall), and overlapping passes (50% overlap on every stroke). If the finish is rough or textured, the most common causes are paint that is too thick, distance that is too great, or pressure that is too low.
Can I spray paint over wallpaper?
It is possible but not recommended. Spray painting wallpaper can cause it to bubble, peel, or absorb moisture unevenly. In most cases, removing the wallpaper and painting the bare wall produces a far better and more durable result.
Is spray painting a wall better than using a roller?
For large surfaces, spray painting is faster and produces a smoother finish with no roller texture. For very small areas or highly detailed surfaces, a brush or roller is sometimes more practical. The best professional results on full walls typically combine spray painting for the main surface with a brush for cutting in at edges.
Final Thoughts
Knowing how to spray paint a wall correctly is a skill that pays dividends on every home improvement project you take on. The process — clean, repair, sand, mask, spray in overlapping passes, two coats, remove masking — becomes faster and more intuitive each time you do it, and the results are consistently better than rolling or brushing.
Take your time with the preparation. Do not rush the masking. Test your spray pattern on cardboard before touching the wall. Keep your movements steady and overlapping. Those four habits alone will produce better results than most first-time spray painters achieve.
For more guidance on choosing the right products, materials, and tools for your specific project, explore our related guides below.
Related Articles
- How to Choose the Right Spray Paint for Any Project
- How to Spray Paint Wood: The Complete Guide to a Smooth, Professional Finish
- How to Spray Paint Metal: The Complete Guide
- How to Spray Paint Plastic: The Complete Guide to a Finish That Actually Sticks
- 10 Common Spray Paint Mistakes (And How to Fix Every One of Them)
- Spray Painting Safety: Everything You Need to Know to Stay Safe
- How to Spray Paint Outdoors: Tips for Weatherproof Results
- Top 10 Spray Paint DIY Projects for Your Home