By Rodney Shiner | DIY Projects & Ideas | Updated July 2026
Reading Time: ~14–16 minutes
A bike frame repaint is one of the highest-impact spray paint projects on this site — a scratched, faded, or just plain boring frame can look genuinely showroom-fresh for the cost of a few cans of paint and a weekend of your time. It’s also a project people tend to rush, which is exactly why so many DIY bike paint jobs end up chipping at the first rock strike or peeling within a season.
Bike frames get treated harder than almost anything else you’d spray paint — flexed constantly, hit with road debris, exposed to weather, gripped and leaned against things. A finish that would hold up fine on a decorative planter needs real reinforcement to survive daily riding. This guide covers disassembly, prep, paint selection, application, and the durability steps that separate a paint job that lasts one summer from one that lasts years, whether you’re refreshing a commuter bike or restoring a project frame you picked up secondhand.
Most of this project follows the same core principles covered in our metal spray painting guide, since the majority of bike frames are steel or aluminum — but a few bike-specific steps make a real, lasting difference in the final result, which is what the rest of this guide focuses on in detail.
Step 1: Disassemble as Much as You Can
This is the step people skip most often, and it’s the single biggest factor in how professional the final result looks. A frame painted while still fully assembled means masking tape lines around every cable, derailleur, and bottle cage mount — and masking tape lines are exactly what read as “amateur paint job” on a finished bike. Full disassembly takes an extra hour or two upfront but pays for itself many times over in the final appearance.
- Remove the wheels, drivetrain (crankset, derailleurs, chain), brakes, seat post, and handlebars/stem at minimum.
- Remove cable guides and housing where possible — these are cheap to replace if damaged and painting around them never looks as clean as painting under them.
- Leave the headset cups and bottom bracket cups in place if you’re not comfortable reinstalling them, but mask them very carefully with tape and plastic bags rather than trying to paint around exposed threads.
- Take reference photos before you start disassembling — cable routing and small part orientation are easy to forget by reassembly day.
Step 2: Strip or Sand the Old Finish
Whether you strip down to bare metal or just scuff the existing paint depends on the current finish’s condition.
- If the existing paint is sound (no rust, no major chipping, good adhesion), a thorough scuff-sand with 220-grit sandpaper is often enough — you’re creating a surface for the new paint to grip, not removing every trace of the old finish.
- If there’s rust, deep chips, or the old paint is flaking, strip back to bare metal in the affected areas using a chemical paint stripper or sandpaper, then treat any exposed rust before moving forward.
- Pay special attention to high-stress areas — the bottom bracket shell, dropouts, and anywhere cables rub against the frame — since these spots see the most wear and are where paint fails first if prep is rushed.
- Clean the frame thoroughly with a degreaser after sanding to remove grinding dust and any residual chain lube or road grime, then wipe with isopropyl alcohol before priming.
Step 3: Prime for the Metal You’re Working With
Bike frames are almost always steel, aluminum, or carbon fiber, and each needs slightly different prep. Our metal spray painting guide covers primer selection by metal type in depth, but the short version for bikes: steel frames need a rust-inhibiting primer, aluminum frames need a self-etching primer since standard primers don’t bond well to aluminum’s naturally oxidized surface, and carbon fiber frames need a primer specifically labeled safe for composite materials, since some solvents in standard primers can degrade the resin in carbon layups. Getting this one choice right or wrong has more impact on long-term durability than almost any other decision in the entire project.
- Apply primer in thin, even coats, paying close attention to tube junctions and welds where primer tends to pool or run if applied too heavily.
- Let primer cure fully per the label before color — rushing this step is one of the most common causes of adhesion failure on a project this labor-intensive.
- Lightly sand cured primer with 320–400 grit for the smoothest possible base before color goes on.
Step 4: Choose Your Paint
| Paint Type | Best For | Durability Notes |
| Standard enamel spray paint | Budget builds, less-ridden bikes | Adequate with a hard clear coat; more prone to chipping alone |
| Bike-specific spray paint (acrylic lacquer formulas) | Frames that see regular riding | Formulated for flex and vibration resistance better than general-purpose paint |
| Automotive-grade acrylic enamel | Daily riders, higher-mileage builds | Excellent durability, wider color range, more UV-stable |
| Powder coating (professional service, not DIY spray can) | Maximum durability, high-use bikes | Best overall durability but requires sending the frame to a shop |
If budget and convenience matter most, a quality automotive-grade enamel with a hard clear coat on top gets you most of the way to powder-coat durability at a fraction of the cost and without shipping your frame anywhere or waiting on a shop’s schedule.
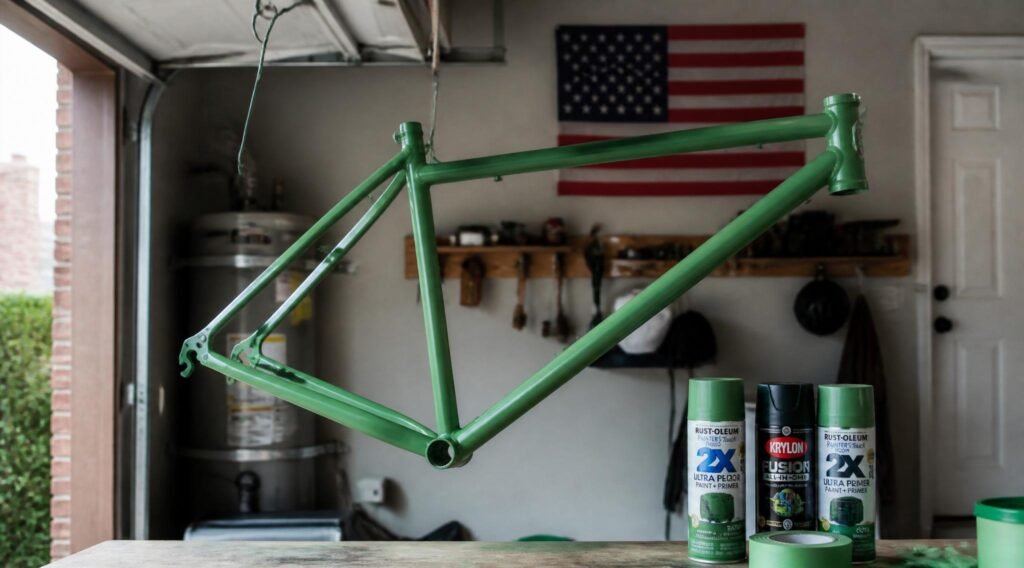
Step 5: Set Up Your Spray Space
A bike frame’s odd, elongated shape makes it trickier to spray evenly than a flat panel — hang it from the ceiling or a sturdy stand by the seat post or through the bottom bracket shell using wire or a hook, so you can rotate and access every tube and angle without touching wet paint. Our spray paint safety guide covers ventilation setup in detail — a frame this size benefits from real outdoor spraying or a well cross-ventilated garage rather than a cramped indoor space.
Step 6: Apply Thin, Even Coats
The tube shape of a bike frame makes it especially prone to paint pooling at joints and drips running down curved surfaces if you go too heavy. Our spray painting tips guide covers the core technique this project depends on: 8–12 inches of distance, smooth overlapping passes, and 3–4 thin coats rather than 1–2 heavy ones.
- Spray tube junctions and welds from multiple angles rather than one pass, since these areas have the most complex geometry on the whole frame.
- Rotate the frame between coats rather than trying to cover it fully from one position — hanging it lets you walk around it, which produces far more even coverage than spraying a stationary frame from awkward angles.
- Watch closely for drips forming at the lowest point of each tube as you spray — tube shapes hide a forming run longer than a flat panel would, so check from multiple angles as you go rather than only from your spraying position.
Curing and Handling Time
Touch-dry typically happens within an hour, but full cure for most enamel-based frame paints takes 5–7 days, sometimes up to two weeks for maximum hardness in cool or humid conditions. Reassembling and riding the bike before the paint has genuinely cured is one of the most common reasons a fresh frame paint job chips within the first few rides — cable housing rubbing against soft paint, a knee brushing the top tube, a bag strap catching an edge, or simply leaning the bike against a wall before the finish has hardened enough to resist a light impact.
Resist the temptation to reassemble immediately. If you can, let the frame cure somewhere out of the way for the full week before putting it back together and riding it.
Step 7: Seal With a Durable Clear Coat
This step matters more on a bike than almost any other project on this site. A clear coat is what actually determines whether your paint survives rock chips, cable rub, and daily handling. Our clear coat guide covers gloss, satin, and matte options — for a frame that will see real riding, favor a hard automotive-grade clear coat over a soft craft-project clear coat, and apply at least two coats for meaningful chip resistance.
Pay extra attention to high-wear zones when clear-coating: the underside of the down tube (road debris), anywhere cable housing contacts the frame, and the top tube if you carry a bag with straps. An extra pass or two of clear coat in these specific areas adds real-world durability where it matters most, and it’s a five-minute addition to a step you’re already doing.
Handling Aluminum and Carbon Fiber Frames
Aluminum frames need that self-etching primer mentioned earlier — skipping it is the single most common reason aluminum frame paint jobs fail early, since paint that seems to adhere fine at first often lifts in sheets within weeks without it.
Carbon fiber requires the most caution of the common frame materials. Avoid aggressive sanding, which can damage the structural fibers beneath the surface resin — a light scuff with fine-grit sandpaper or a scotch-brite pad is sufficient, and never sand through the clear protective layer down to visible fibers. If you’re at all unsure about a carbon frame’s condition, a bike shop consultation before painting is worth it — structural damage to carbon fiber isn’t always visible, and it’s not a material where you want to guess.
Painting Small Parts and Accents
Fenders, chain guards, and some accessory brackets are often plastic rather than metal — our plastic spray painting guide covers the different prep these parts need, since standard metal primer won’t adhere properly to plastic components.
Chrome components like some older frame’s bottom bracket shells or seat clamps generally aren’t worth painting over — chrome is notoriously difficult for paint to grip. If you do want to change the look of a chrome part, our guide to painting stainless steel and similar reflective metals covers the extra adhesion steps that difficult, ultra-smooth metal finishes require.
Common Mistakes and Troubleshooting
Bubbling on tube surfaces usually comes from spraying over trapped moisture or oil left from degreasing — our guide on why spray paint bubbles covers the fix, which almost always means sanding back and starting the affected section over with a properly cleaned and dried surface.
Drips at tube junctions and welds are the most common cosmetic issue on a bike repaint, precisely because these are the areas most likely to get too much paint in one pass. Our guide to fixing spray paint drips and runs covers the sand-and-recoat process for cleaning these up before your final clear coat.
If a previous repaint attempt already went wrong and you’re touching up rather than starting fresh, our guide on painting over existing spray paint covers how to blend new paint into an old finish without an obvious visible seam.
Should You Use a Spray Gun Instead of Aerosol Cans?
For a project this size and this visible, some painters step up from aerosol cans to an HVLP spray gun for more control and a smoother finish. Our guide to spray gun types covers the tradeoffs — a gun gives you finer control over coat thickness and reduces the risk of the pooling and drips that tube junctions are prone to, at the cost of needing compatible thinned paint and more cleanup than a rattle can.
Planning Your Color and Finish
Before you buy a single can, decide on gloss, satin, or matte, and whether you’re doing a single solid color, a fade, or a two-tone design with masked sections. Matte and satin finishes are more forgiving of minor prep imperfections and small dust nibs than high gloss, which shows every flaw under direct light — a real consideration for a first-time frame paint project.
Two-tone designs and fades require careful masking with quality automotive-grade tape rather than standard painter’s tape, since a soft edge or bleed-through under the mask is far more noticeable on a frame than it would be on a wall or piece of furniture. If this is your first frame repaint, a single solid color is the more forgiving choice — you can always add masked accent details in a future refresh once you’ve got a feel for how the paint behaves on this specific frame.
It’s worth deciding on your final look before you start prep work rather than partway through, since some finishes (metallic flake, for instance) show sanding marks and surface imperfections more readily than a flat solid color would.
Dealing With Decals, Stickers, and Original Branding
Most frames arrive with manufacturer decals under a clear coat layer, which need to come off during stripping and sanding — trying to paint over them usually shows a visible ridge outline once the new paint cures. If you want to preserve the original branding look, some painters mask and re-letter with vinyl decals after the repaint rather than trying to protect the factory originals through a full strip-and-prime process.
If you’re planning to apply new decals or a design of your own after painting, do this before your final clear coat rather than after — sealing decals under a clear coat protects them from chipping and peeling in a way that decals applied over bare paint simply can’t match.
Reassembly and Long-Term Care
- Reassemble carefully once the frame has fully cured, using care around freshly painted areas where cables and housing will make repeated contact.
- Apply a light coat of frame wax or a dedicated bike frame protectant every few months to maintain gloss and add an extra layer of chip resistance.
- Touch up small chips as soon as you notice them — an isolated chip left exposed can let moisture under the surrounding paint and spread into a larger peeling area over time.
- Wipe the frame down after wet or muddy rides rather than letting grime sit against the fresh paint for extended periods.
Budgeting Time and Materials for the Project
A full frame repaint is a multi-day project once you account for cure times, even though the active hands-on work is relatively compact. Realistically budget an afternoon for disassembly and prep, another afternoon spread across primer and color coats with drying time between them, and then a full week of hands-off curing before reassembly.
Materials-wise, expect to spend somewhere between $40–$80 for a complete project — primer, 2–3 cans of color, clear coat, sandpaper in a couple of grits, degreaser, and masking supplies — which compares very favorably to professional respray or powder coating services that often start several times higher than that for a single frame.
Frequently Asked Questions
Can I spray paint a bike frame without removing the components?
You can, but expect a noticeably less professional result — masking tape lines around cable housing, derailleurs, and mounts are difficult to make invisible, and paint tends to build up unevenly around masked edges. Full disassembly gives dramatically better results for the same amount of paint.
Do I need to prime an aluminum bike frame?
Yes, and specifically with a self-etching primer rather than a standard one. Aluminum’s natural oxide layer prevents standard primers from bonding well, and skipping this step is one of the most common causes of early paint failure on aluminum frames.
How long should I wait before riding a freshly painted bike?
Give the paint and clear coat at least 5–7 days to fully cure before reassembly and riding, longer in cool or humid conditions. Riding on paint that hasn’t fully hardened is one of the most common causes of early chipping.
Is spray paint durable enough for a bike I ride daily?
With the right prep, a bike-specific or automotive-grade paint, and a hard clear coat, yes — daily riders hold up well with proper application. For maximum durability beyond what any spray can offers, professional powder coating is the upgrade path, though it requires sending the frame to a shop.
Can you spray paint over carbon fiber safely?
Yes, with light prep rather than aggressive sanding, and a primer specifically labeled safe for composite materials. Avoid sanding through the surface resin layer, and consult a bike shop if there’s any question about the frame’s structural condition before painting.
Should I paint the fork along with the frame?
If the fork is steel or aluminum and removable, yes — treating it as part of the same project ensures color and finish match exactly. Suspension forks with internal components need extra care to keep paint and solvents away from seals and stanchions, so mask those areas thoroughly or leave fork painting to a shop if you’re not confident isolating them.
How many cans of paint does a full frame typically need?
Most frames need 2–3 cans of color for full coverage in thin coats, plus 1–2 cans of primer and 1–2 cans of clear coat, depending on frame size and how many mistakes you sand back and recoat along the way. Buying an extra can of color from the same batch is cheap insurance against running short mid-project.
Final Thoughts
A bike frame repaint rewards exactly the same patience that every other project on this site does — full disassembly, proper prep for your specific frame material, thin coats, real cure time, and a durable clear coat. Skip any of those steps and you’ll be repainting again within a season. Respect them, and a rattle-can bike repaint can genuinely rival a professional job for a fraction of the cost.
Take your time with disassembly and masking especially — it’s the least exciting part of the project and the one that determines whether the finished bike looks custom-painted or just touched up.
Once you’ve got one frame repaint under your belt, the process gets noticeably faster the second time — most of the learning curve is in understanding how your specific frame material and shape behaves, and that knowledge carries directly into your next project, whether it’s another bike or one of the many other metal projects covered elsewhere on this site.