
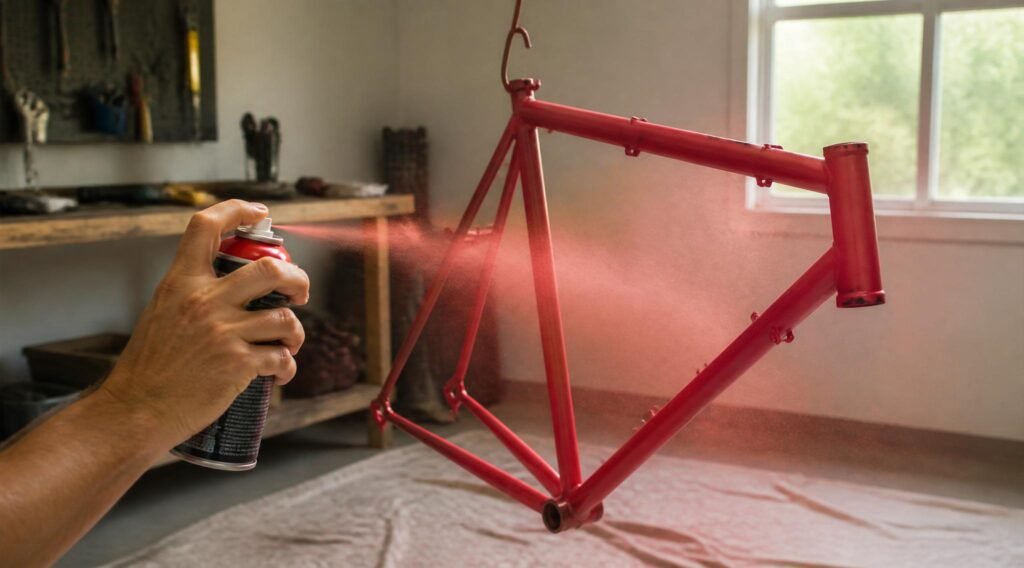
That old bike in your garage doesn’t need to go to the landfill just because the paint is chipped, faded, or simply outdated. Learning how to spray paint a bike frame is one of the most rewarding weekend projects a home DIYer can tackle — it costs a fraction of a professional respray, takes less than a full weekend, and gives you complete creative control over the final color and finish.
Whether you’re reviving a rusty steel road bike, refreshing an aluminum mountain bike frame, or simply want a custom color that no shop offers, this guide walks you through every single step: from stripping the old finish to applying a durable clear coat that will survive years of rides, rain, and rough handling.
By the end of this guide, you’ll know exactly what materials to buy, how to prep different frame materials (steel, aluminum, and carbon fiber), which paints hold up best on a bike, and how to avoid the most common mistakes that ruin an otherwise great respray.
Table of Contents
ToggleWhy Spray Paint Your Bike Frame Instead of Brush Painting?
Bike frames have tight tubing, welded joints, curved forks, and narrow gaps around the bottom bracket and dropouts — all places where a brush leaves streaks and pooling. Spray painting solves this instantly. A fine atomized mist gets into every contour and produces the same smooth, professional-looking outcome you’d expect from a shop respray, without brush marks or uneven buildup in corners.
If you’re new to spray equipment in general, it helps to understand the tools available before you start. Our breakdown of the different types of spray guns for painting is a useful primer if you’re considering a gun-and-compressor setup instead of aerosol cans for this project.
What You’ll Need Before You Start
Gathering everything upfront prevents mid-project trips to the hardware store, which almost always ruins your timing between coats.
Frame preparation tools:
- Allen key / hex wrench set (for full disassembly)
- Degreaser (citrus-based or dedicated bike degreaser)
- 220-grit and 400-grit sandpaper
- Fine synthetic scouring pad (like a Scotch-Brite pad)
- Isopropyl alcohol (90%+) and lint-free cloths
- Painter’s tape and masking paper
- Rubber plugs or tape for threaded holes (bottom bracket, headset cups)
Painting materials:
- Self-etching primer (metal frames) or plastic adhesion promoter (carbon/composite frames)
- 2–3 cans of your chosen spray paint color
- 1–2 cans of clear coat (UV-resistant, if the bike will live outdoors)
- Wire coat hangers or paracord for hanging the frame while spraying
Safety gear:
- Respirator mask rated for organic vapors (not just a dust mask)
- Safety glasses
- Nitrile gloves
- A well-ventilated space — an open garage with a fan, or outdoors on a calm, dry day
Step 1: Fully Disassemble the Bike
This is the step people are most tempted to skip, and it’s the one that determines whether your final result looks professional or amateurish. Remove everything you can:
- Wheels, tires, and skewers
- Handlebars, stem, and headset (if accessible)
- Seat post and saddle
- Derailleurs, chain, and cables
- Brake calipers
- Bottom bracket and crankset, if you’re comfortable doing so
The goal is a bare frame and fork with nothing but threaded inserts and bearing races left. Every sticker, cable housing guide, or bracket left in place becomes a hard edge in your paint job and a spot where masking tape lines will show later.
Once stripped, plug all threaded holes (bottom bracket shell, water bottle bosses, derailleur hanger) with tape or rubber plugs. Overspray inside threads causes headaches during reassembly.
Step 2: Strip or Sand Off the Old Finish
You have two paths here, depending on the condition of the existing paint.
If the old paint is in good condition (no rust, no major chipping, still tightly bonded): You can scuff-sand rather than fully strip. A thorough scuff with 220-grit sandpaper, followed by 400-grit for smoothness, is often enough to give new paint a surface to grip.
If there’s rust, heavy chipping, or you want a completely fresh base: Full paint stripping is worth the extra time. Chemical paint strippers work on steel and aluminum frames, but always test on a hidden area first, and never use aggressive strippers on carbon fiber — the resin layer can be damaged. If you’re dealing specifically with old spray paint layers underneath, our guide on how to remove spray paint covers safe stripping methods for different surfaces without gouging the metal underneath.
After stripping or sanding, wipe the entire frame down with isopropyl alcohol to remove dust, oils, and any residue from the stripping chemicals. Handle the frame with clean gloves from this point forward — skin oils alone are enough to compromise adhesion on a freshly prepped surface.
Step 3: Address Rust and Bare Metal Spots
If your frame is steel and you’ve found rust spots, treat them before priming. A wire brush or rust-removal gel will get you down to clean metal, and a rust-converting primer will lock in any microscopic rust you can’t fully remove, preventing it from bleeding through the new paint months later.
Aluminum frames don’t rust the same way, but they do oxidize, forming a dull white powder on bare aluminum. This oxide layer needs to be sanded off completely, since paint won’t bond to it reliably.
Step 4: Choose the Right Primer for Your Frame Material
This is the single most important decision in the entire project, and it depends entirely on what your frame is made of.
Steel frames: Use a self-etching primer or a rust-inhibiting metal primer. Self-etching primers contain a mild acid that chemically bites into bare metal, giving your paint something to mechanically and chemically grip.
Aluminum frames: Aluminum needs a primer specifically labeled for aluminum or “all-metal” use, since standard primers can react poorly with aluminum’s natural oxide layer. Self-etching primers formulated for aluminum work well here too.
Carbon fiber frames: Carbon frames should never be sanded aggressively (you risk cutting into structural fibers) and should never be chemically stripped with harsh solvents. Light scuffing with a fine pad, followed by a plastic-compatible adhesion promoter rather than a metal primer, is the safer route. If your bike has plastic fairings, guards, or composite parts mixed with the metal frame, it’s worth reading our dedicated guide on how to spray paint plastic, since plastic components need an entirely different adhesion strategy than metal tubing.
For difficult adhesion cases — heavily oxidized aluminum, previously powder-coated frames, or mixed carbon/metal builds — a dedicated adhesion promoter applied before primer dramatically improves your odds of a paint job that doesn’t chip on impact. Our full comparison in the best adhesion promoter guide breaks down which promoter suits which surface, including products specifically documented for metal and mixed-material substrates.
Apply primer in 2–3 light coats, holding the can 8–10 inches from the frame and keeping it moving constantly to avoid pooling in tube junctions and around the bottom bracket shell. Let each coat flash off for the time listed on the can before applying the next.
Step 5: Pick the Right Paint Type for a Bike Frame
Not all spray paints are built to survive the flexing, vibration, and impact a bike frame experiences. Consider these options:
- Enamel spray paint — Durable, hard-wearing, and widely available. A solid default choice for steel and aluminum frames that will see regular outdoor riding.
- Acrylic spray paint — Dries fast and offers vibrant color options, though it’s generally less impact-resistant than enamel on its own. Works well when followed by a strong clear coat.
- Automotive-grade spray paint — Formulated for exactly this kind of use case: constant vibration, UV exposure, and weather. Slightly pricier, but often the best long-term investment for a frame that lives outdoors.
If you’re unfamiliar with how these paint families differ in general — drying behavior, surface compatibility, and finish characteristics — the overview in our spray paint types guide is a good primer before you commit to a can.
Step 6: Apply the Color Coats
Hang the frame from a wire hanger threaded through the seat tube or bottom bracket shell so you can rotate it freely and reach every angle without touching wet paint. Set up in your ventilated space with drop cloths beneath.
Technique matters more than the paint itself:
- Hold the can 8–10 inches from the surface.
- Start spraying just off the edge of the frame, sweep across in one smooth pass, and release the trigger just past the other edge. Never start or stop directly on the frame — that’s where blotches and drips happen.
- Overlap each pass by about 50% so the film builds evenly with no thin or bare strips.
- Apply 3–4 thin coats rather than 1–2 thick ones. Thick coats are the number one cause of runs and drips on vertical tubes.
- Rotate the frame between coats so you’re always spraying on a surface that’s roughly vertical or angled slightly downward — spraying straight up into the underside of tubes causes pooling.
Between coats, respect the flash time printed on the can — usually 10–15 minutes. Rushing this step traps solvent under the surface, which later shows up as bubbling or a soft, dent-prone finish.
Step 7: Understand Drying Time Before You Touch Anything
One of the most common ways people ruin a fresh bike respray is handling it too soon. Spray paint can feel dry to a light touch within 20–30 minutes, but that’s only surface dryness — the layers underneath are still curing.
Full cure time before the frame can handle real-world stress (reassembly, riding, exposure to rain) typically runs 24–72 hours depending on the paint type, humidity, and temperature. For a detailed breakdown of how different paint formulas and environmental conditions affect timing, see our guide on how long spray paint takes to dry — understanding this timeline will save you from soft, easily-marked paint that never fully hardens properly.
Step 8: Apply a Protective Clear Coat
A clear coat isn’t optional on a bike frame — it’s the layer that actually protects your color coat from UV fading, chain lube splatter, water, and the general abuse a bike takes. Skipping it is the single biggest reason DIY bike resprays look great for a month and then fade or chip within a season.
Apply 2–3 light coats of clear, following the same overlapping technique used for the color coats. Automotive-grade clear coats generally offer the best UV resistance for a frame that lives outdoors, but a quality acrylic clear can also work well if you’re using acrylic color underneath. The principles for choosing and applying a compatible clear finish are covered in more depth in our acrylic spray paint guide, specifically the section on matching clear coats to your base paint type so the sheen and chemistry are compatible.
Let the clear coat cure fully — 24–48 hours minimum — before reassembling or riding the bike.
Step 9: Reassembly
Once fully cured, remove all masking tape and plugs, and reinstall components in reverse order of disassembly. A few tips here:
- Reinstall the bottom bracket and headset carefully — freshly painted threads can be slightly thicker, so don’t force anything.
- Grease all bearing surfaces and threads as you normally would during a bike rebuild.
- Wait until the paint has fully cured before mounting anything that clamps tightly against the frame (seat post, stem), since a clamp on soft paint can leave a permanent mark.
Common Mistakes When You Spray Paint a Bike Frame (And How to Fix Them)
Runs and drips on tubes: Almost always caused by holding the can too close or applying coats too thick. If it happens, let the area cure completely, then wet-sand the drip flat with 600-grit sandpaper and reapply a thin coat over the repaired spot.
Paint chipping at high-contact points (chainstay, down tube near cables): These areas take constant abrasion from cables and debris. Add an extra coat of clear specifically over these zones, or apply a clear protective film after the paint fully cures.
Peeling near welds or joints: Usually a sign of insufficient scuffing or contamination before priming. If you already have paint that’s failed this way, don’t paint over it — strip that section back down. Our guide on how to remove spray paint will help you take it back to bare metal without damaging the frame, so you can redo the prep properly.
Wanting to change the color again later: Good news — once a frame has been properly primed and painted, you generally can repaint over it rather than stripping back to bare metal every time. Our article on whether you can paint over spray paint explains what surface prep is still required even when you’re painting over an existing spray-painted layer, which applies directly to a bike frame getting its second respray.
DIY Respray vs. Professional Powder Coating: Cost Comparison
Before you commit a full weekend to this project, it’s worth understanding what you’re actually saving. A professional powder-coating service for a bike frame typically runs $80–$200 depending on your region and the shop’s turnaround time, and that’s before you factor in dropping the frame off and picking it up days later.
A DIY spray paint job, by contrast, usually costs $25–$45 total: two to three cans of primer and color, one or two cans of clear coat, and basic prep supplies you may already own (sandpaper, tape, degreaser). The trade-off is time and labor — you’re investing a weekend of your own effort in exchange for a fraction of the cost, plus full control over the exact color and finish.
If your frame has sentimental value, structural concerns, or you want a factory-level finish for resale, professional powder coating is worth the premium. For a personal bike you ride regularly and want to refresh or customize, spray painting is the far more practical route.
Choosing a Color and Finish
Color choice is personal, but a few practical points are worth considering before you buy cans:
- Gloss finishes show off metallic and pearl effects best, but they also show every surface imperfection more clearly, so your prep work needs to be near-flawless.
- Matte and satin finishes are more forgiving of minor surface texture and have become a popular choice for modern bike builds, giving a stealthier, more understated look.
- Metallic and flake paints add depth and visual interest but typically require an extra clear coat to lock the flake particles in place and protect the finish from catching on debris.
- Two-tone designs (a different color on the fork, or a contrasting panel on the down tube) require careful masking with painter’s tape after the base color has fully cured, then a second round of primer, color, and clear over the masked section.
Whatever finish you choose, buy an extra can beyond what you think you’ll need. Running short mid-project, when the paint on your frame is only half-dry, is far more disruptive than having one leftover can in the garage.
Ventilation and Workspace Setup
Spray painting a bike frame produces a fine airborne mist that lingers far longer than most people expect, and cans that advertise “low odor” still release solvents and particulates you shouldn’t be breathing directly. A few workspace essentials before you start:
- Work in an open garage with the door up and a box fan pulling air outward, or set up outdoors on a calm, dry, low-wind day.
- Lay drop cloths or cardboard beneath and around the hanging frame — overspray travels further than it looks like it will.
- Keep the workspace between 65–85°F (18–29°C) if possible. Cold temperatures cause poor atomization and a rough, speckled finish, while very hot, humid conditions can cause paint to dry too fast on the surface while staying soft underneath.
- Since most aerosol spray paints use flammable propellants, keep the area away from open flames, pilot lights, and other ignition sources, and always read the label and safety data sheet for the specific product you’re using.
Maintaining Your Freshly Painted Frame
A little routine care extends the life of a DIY respray considerably. Rinse the frame with water rather than a high-pressure hose, which can force water past bearing seals and stress the paint edges. Wipe the frame dry after wet rides rather than letting it air-dry with water sitting in joints. Touch up small chips as soon as you notice them with a small artist’s brush and a dab of matching paint — catching a chip early prevents it from spreading into a larger peeling patch. If you store the bike outdoors, a breathable bike cover will meaningfully slow UV fading, especially on brighter, more saturated colors.
Frequently Asked Questions
Do I need to remove the bottom bracket and headset to paint a bike frame? Not strictly, but it’s strongly recommended. Leaving them in place means masking around bearing surfaces, which is fiddly and increases the risk of overspray fouling the bearings. Full removal gives cleaner results and easier masking.
Can I spray paint a carbon fiber bike frame? Yes, but with caution. Avoid aggressive sanding or chemical strippers, use a plastic/composite-compatible adhesion promoter rather than a metal etching primer, and stick to light coats to avoid excess weight or hiding any hairline cracks you’d normally want to inspect for.
How many cans of spray paint does a bike frame need? Most frames need 2–3 cans of color and 1–2 cans of clear coat, depending on frame size and how many coats you apply. Buying an extra can of each is cheap insurance against running short mid-project.
Will spray paint hold up as well as powder coating? Powder coating is generally more durable and chip-resistant than spray paint, since it’s baked on as a thicker, fused layer. A well-prepped spray paint job with a quality clear coat can come close, but it requires more careful maintenance over time, especially at high-wear points.
How long should I wait before riding the bike after painting? Wait a minimum of 3–5 days after the final clear coat, even if the paint feels dry to the touch after a day. Full chemical cure — the point where the paint reaches its maximum hardness and chip resistance — takes longer than surface drying.
Can I paint over stickers or decals instead of removing them? No — always remove decals and adhesive residue completely before priming. Paint applied over a decal edge creates a visible ridge and will eventually peel from that edge inward.
Final Thoughts
Learning how to properly spray paint a bike frame comes down to three things that matter more than the paint itself: thorough disassembly, correct primer selection for your frame material, and patience with drying and cure times between every stage. Rush any one of these three and even the best spray paint on the market will chip, peel, or fade within months.
Take it slow, work in thin coats, and give the frame the full cure time it needs before you put it back together. Done properly, a DIY respray can look every bit as good as a shop job — at a fraction of the cost, and in a color nobody else on the trail is riding.