
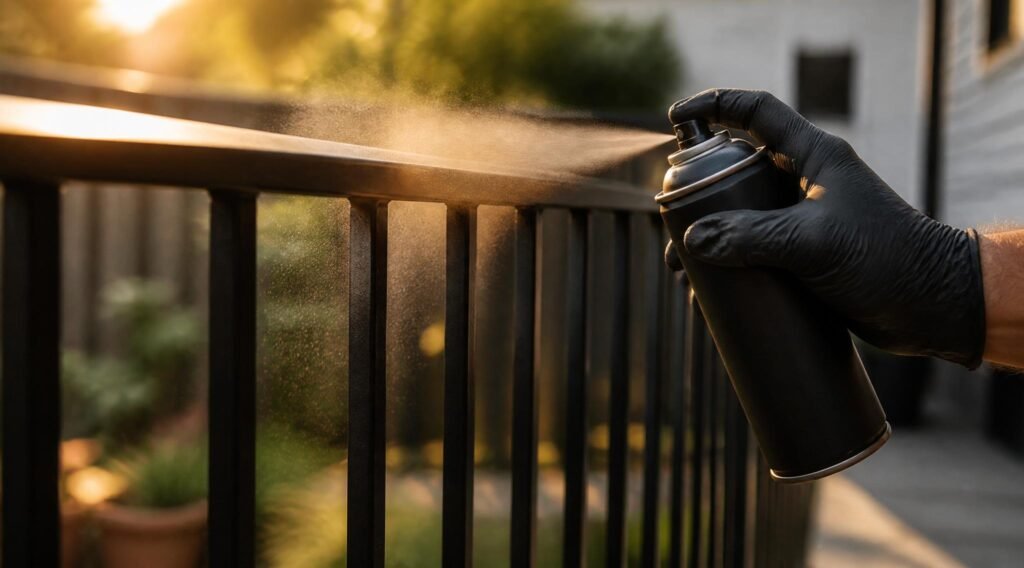
Metal is everywhere in the average home — railings, patio furniture, radiators, tool boxes, bike frames, car rims, mailboxes, light fixtures. And unlike wood or plastic, metal comes with one enemy that ruins more paint jobs than bad technique ever will: rust. If you’ve ever spray painted a metal surface only to watch it bubble, peel, or bleed orange stains through the topcoat within a few months, the paint wasn’t the problem. The prep was.
This guide walks through exactly how to spray paint metal so the finish actually lasts — from identifying what kind of metal you’re working with, to rust removal, priming, paint selection, application technique, and long-term care. Whether you’re refinishing a wrought iron gate, giving an old filing cabinet new life, or prepping a bike frame for a full respray, the process below will get you a durable, professional-looking result.
If you’re painting a different surface, our guides on how to spray paint plastic and how to spray paint cabinets cover the material-specific quirks for those jobs. Metal, however, plays by its own rules — so let’s get into it.
Table of Contents
ToggleWhy Metal Needs a Different Approach Than Wood or Plastic
Wood absorbs paint. Plastic resists it. Metal does something different: it’s non-porous, it expands and contracts with temperature, and — if it’s ferrous (iron or steel) — it actively corrodes when exposed to moisture and oxygen. That combination means paint doesn’t just need to look good on metal on day one. It needs to form a mechanical and chemical bond that can survive:
- Temperature swings that make the metal expand and contract
- Moisture exposure that would otherwise trigger rust underneath the paint film
- Physical wear from handling, weather, or vibration (think bike frames, railings, tools)
This is why skipping primer on metal is a much bigger gamble than skipping it on wood. A paint film with no rust-inhibiting layer underneath can look perfect for months and then fail all at once, as rust forms beneath the surface and pushes the paint off from underneath.
Types of Metal You’ll Be Spray Painting
Not all metal behaves the same way under a spray can. Before you buy paint, identify what you’re actually working with:
Steel and wrought iron — The most common metal for railings, gates, patio furniture frames, and tools. Ferrous, meaning it rusts. Needs a rust-inhibiting primer without exception.
Cast iron — Found in old radiators, cookware, and some furniture. Porous at a microscopic level and prone to rust in the same way as steel, but often has years of old paint or grease buildup that needs stripping first.
Aluminum — Common in patio furniture, ladders, and window frames. Doesn’t rust the way steel does, but forms a natural oxide layer that prevents paint from bonding unless it’s properly prepped and primed with an aluminum-compatible product.
Galvanized metal — Steel coated in zinc (common in fencing, ductwork, and outdoor hardware). The zinc coating actively repels paint adhesion until it weathers or is properly prepped, which is why “peeling galvanized paint” is one of the most common DIY complaints online.
Stainless steel — Appliances, fixtures, trim. Very smooth and low-porosity, so it needs aggressive scuffing before paint will grip at all.
Knowing which of these you’re dealing with determines your primer choice more than anything else in this guide.
What You’ll Need Before You Start
- Wire brush or rust-removal pad (or a rust-dissolving gel for heavy corrosion)
- 220-320 grit sandpaper (or a fine sanding sponge)
- Degreaser or isopropyl alcohol
- Rust-inhibiting or self-etching metal primer
- Metal-rated spray paint (enamel is the standard choice — see the breakdown of spray paint types for how enamel compares to acrylic and latex)
- Clear coat (optional but recommended for high-touch or outdoor items)
- Painter’s tape and drop cloths
- Respirator mask, gloves, and safety glasses
If you’re working on a large piece with contours — patio furniture, railings, ornate ironwork — a spray gun can give you far more control than an aerosol can. Our guide on types of spray guns for painting breaks down which gun style suits detailed metalwork versus flat surfaces.
Step 1: Assess and Remove Rust
Any existing rust must come off before you do anything else. Paint applied over active rust will lock in the corrosion, and it will continue to spread underneath the paint film even though the surface looks fine.
- Light surface rust: A wire brush or 120-grit sandpaper is usually enough. Work until you reach clean, slightly shiny metal.
- Moderate rust: Use a rust-dissolving gel or naval jelly-style product, following the manufacturer’s dwell time, then scrub and rinse.
- Heavy rust or pitting: You may need a wire wheel attachment on a drill or angle grinder. For badly pitted metal, understand that some texture will remain even after treatment — a primer with a rust-converting formula can help stabilize what’s left.
Don’t skip corners, joints, or the underside of railings and furniture legs — these are the spots where moisture collects and rust starts first, and they’re also the spots people forget to treat.
Step 2: Clean and Degrease the Surface
Once rust is gone, metal surfaces almost always carry grease, oil, or handling residue — especially tools, bike frames, and anything that’s been handled with bare hands. Paint will not bond properly over this layer even if it looks clean.
- Wipe the entire surface with a degreaser or isopropyl alcohol (90%+)
- Use a lint-free cloth, working in one direction rather than scrubbing back and forth
- Let the surface dry completely before moving to sanding
- From this point on, handle the piece with clean gloves — skin oils alone can compromise adhesion, the same issue that shows up when prepping plastic surfaces
Step 3: Sand for Mechanical Adhesion
Even on metal with no rust and no old paint, a completely smooth surface (like stainless steel or new aluminum) needs to be scuffed so the primer has something to physically grip.
- Use 220-320 grit sandpaper or a fine sanding sponge
- Sand in a consistent pattern until the surface has a uniform dull, matte look — you’re not trying to remove material, just break the surface tension
- Wipe away all sanding dust with a tack cloth or slightly damp microfiber cloth before priming
If there’s existing paint that’s flaking or chipped, sand back to bare metal in those areas at minimum, feathering the edges so the new paint doesn’t show a visible ridge.
Step 4: Choose the Right Primer
This is the single most important decision in the entire process. Metal primer isn’t optional the way it sometimes is on other materials — it’s the layer that actually prevents rust from forming under the paint.
- Rust-inhibiting primer — The standard choice for steel, iron, and galvanized metal. Formulated to chemically resist moisture penetration.
- Self-etching primer — Best for slick, low-porosity surfaces like aluminum and stainless steel. Contains a mild acid that etches microscopic grip points into the metal.
- Galvanized metal primer — A specific formula needed for zinc-coated surfaces, since standard primers often fail to bond to galvanization.
Apply two light coats rather than one heavy one, letting each coat flash off for the time listed on the can (usually 10-15 minutes) before the next. A primer coat applied too thick will crack or take far longer to cure, which is the same failure mode covered in our guide to adhesion promoters for hard-to-paint surfaces — the underlying principle (thin, even, properly timed layers) applies across materials.
Step 5: Choose the Right Spray Paint for Metal
Once primed, you have more flexibility in paint choice, but not unlimited flexibility.
- Enamel spray paint is the industry standard for metal — it dries into a hard, durable shell that resists chipping and holds up to handling and weather.
- Acrylic spray paint can work for decorative or indoor metal pieces but won’t hold up as well outdoors or under heavy use.
- Direct-to-metal (DTM) paints combine primer and color in one product and are convenient for small touch-ups, though a separate primer step still gives better long-term results on anything exposed to weather.
For a deeper comparison of formulations, see our full breakdown of spray paint types and where each one performs best.
Step 6: Application Technique
Good technique matters more on metal than almost any other surface, because metal shows brush-mark-style imperfections, drips, and unevenness far more visibly than a textured surface like wood or concrete would.
- Work in a well-ventilated area, ideally 65-85°F with low humidity — cold slows curing, high humidity can cause the finish to bloom or haze
- Hold the can or gun 8-12 inches from the surface
- Use light, even, overlapping passes — start moving before you press the trigger, and release before you stop moving
- Apply 2-3 thin coats rather than one thick coat, allowing 10-15 minutes of flash time between coats
- Pay attention to drying and recoat windows — going in too soon traps solvents underneath and causes wrinkling; our guide on how long spray paint takes to dry breaks down realistic timeframes by paint type and conditions
For detailed or ornate ironwork (railings, gates, decorative furniture), an HVLP spray gun gives far more control over contours than an aerosol can — see the spray gun types guide for how to choose between conventional, airless, and HVLP setups.
Step 7: Seal It With a Clear Coat
A clear coat isn’t mandatory, but for anything handled frequently or left outdoors, it adds meaningful protection against UV fading, moisture, and scuffing.
- Apply 2 light coats of a clear coat rated for metal, 10-15 minutes apart
- Choose a UV-resistant formula for anything that sits outdoors — railings, patio furniture, mailboxes
- Allow 24-48 hours of full cure time before the item goes back into regular use, even if it feels dry to the touch sooner
Common Metal Projects and What to Watch For
Railings and gates — High exposure to weather and constant handling means rust-inhibiting primer and a UV-stable topcoat aren’t optional. Pay extra attention to welds and joints, where rust starts first.
Patio and outdoor furniture — Similar considerations to our furniture spray painting guide, but with the added rust-prevention layer that wood and plastic furniture don’t need. Check frame joints and leg bottoms carefully before priming.
Radiators and cast iron pieces — Often carry decades of old paint layers. Test for lead paint on anything pre-1978 before sanding, since dry-sanding old lead paint releases hazardous dust.
Bike frames — Require careful masking of any moving parts, bearings, and threads, plus a hard enamel or specialty bike-frame paint that can handle flexing and impact without chipping.
Tools and toolboxes — Handled constantly, so durability matters more than finish. A hard enamel with a clear coat holds up best against scratches from daily use.
Car rims — Need heat-resistant paint rated specifically for wheels, since standard enamel can discolor or fail under braking heat.
Troubleshooting Common Metal Paint Problems
Paint is peeling in sheets: Almost always a primer failure — either no primer was used, the wrong type was chosen for the metal (e.g., standard primer on galvanized steel), or rust wasn’t fully removed before painting. Strip back to bare metal and start the prep process over.
Rust bleeding through the topcoat: Rust wasn’t fully removed, or a rust-converting primer wasn’t used on residual pitting. Sand back to the affected area, treat with a rust converter, and reprime before repainting.
Paint looks wrinkled or crinkled: A second coat was applied before the first had properly flashed off, trapping solvent underneath. Let coats dry fully between passes and follow the timing on the can.
Orange peel texture: The can or gun was held too close, or too much paint was applied per pass. Back off to 8-12 inches and use lighter, faster passes.
Chipping around edges and corners: Common on tools, furniture, and railings that get bumped often. A hard enamel with a clear coat resists this far better than a single soft paint layer alone.
How to Maintain a Painted Metal Surface
- Rinse outdoor metal periodically to remove salt, pollen, and grime buildup that can trap moisture against the paint film
- Touch up small chips as soon as they appear — an exposed spot of bare metal is where rust restarts
- Reapply clear coat every couple of years on high-exposure outdoor pieces, since UV protection wears down faster than the color coat underneath
- Store or cover metal furniture during off-seasons if possible, since consistent moisture exposure is the single biggest factor in paint failure on metal
Safety Considerations You Shouldn’t Skip
Spray painting metal often involves more aggressive prep than other surfaces — grinding, wire-wheeling, and chemical rust removers all carry their own risks that are easy to underestimate in a home garage setting.
- Dust and particulates: Sanding rust or old paint kicks up fine metal and paint dust. Wear a properly rated respirator, not just a paper dust mask, especially when working with power tools.
- Old paint layers: If the metal piece predates 1978 (older furniture, radiators, railings), test for lead paint before dry-sanding. Wet-sanding or using a chemical stripper reduces airborne lead dust significantly if lead is present.
- Ventilation: Enamel and solvent-based paints release stronger fumes than water-based acrylics. Work outdoors or in a well-ventilated garage with the door open, and use a respirator rated for organic vapors, not just dust.
- Flammability: Aerosol propellants and many metal primers are flammable. Keep spraying away from open flames, pilot lights, and running power tools that could throw a spark.
- Rust chemical treatments: Rust converters and dissolving gels are often acidic. Wear gloves and eye protection, and follow the ventilation instructions on the product label.
DIY vs. Professional Refinishing: What It Actually Costs
For most household metal items — railings, small furniture, tools, bike frames — a full DIY spray paint job typically runs $25-60 in materials (primer, paint, clear coat, sandpaper, and degreaser), plus a weekend of your time spread across prep, painting, and cure time. Professional powder coating or refinishing services for the same items commonly run $75-300+ depending on size and the shop’s rates, since it includes labor, a controlled spray booth, and often a baked-on finish that cures harder than air-dried spray paint.
DIY spray painting makes the most sense for furniture, railings, and decorative pieces where a hand-applied enamel finish is durable enough. Powder coating tends to be worth the extra cost for items that take heavy daily abuse — patio furniture frames in harsh climates, high-traffic railings, or anything that needs an industrial-grade finish that can outlast several DIY repaint cycles.
A Quick-Reference Checklist
Before you start spraying, run through this list so you’re not pausing mid-project to hunt down a missing step:
- Rust removed from every surface, including joints and undersides
- Surface degreased and fully dry
- Sanded to a uniform dull finish, dust wiped away
- Correct primer chosen for the specific metal type (steel, aluminum, galvanized, etc.)
- Two thin primer coats applied with proper flash time between them
- Metal-rated enamel (or DTM paint) applied in 2-3 thin, even coats
- Clear coat applied if the piece will be handled often or left outdoors
- Full 24-48 hour cure time given before regular use
Skipping any single step on this list is the most common reason a metal paint job fails within months instead of lasting for years.
Frequently Asked Questions
Do I really need primer to spray paint metal? Yes. Metal primer isn’t a cosmetic step — it’s what prevents rust from forming beneath the paint film. Skipping it dramatically shortens the lifespan of any paint job on metal.
Can I spray paint metal without sanding first? Only if the surface is already properly scuffed or the primer is explicitly labeled for “no-sand” application on that metal type. On smooth metals like stainless steel and aluminum, sanding is what gives the primer something to grip.
What’s the best spray paint for outdoor metal furniture? A rust-inhibiting or self-etching primer followed by a UV-resistant enamel topcoat, sealed with a clear coat rated for outdoor use, gives the most durable result.
How long does spray paint need to cure on metal before it’s used? The surface is usually dry to the touch within an hour, but full hardness and chemical cure typically takes 24-48 hours. Wait the full window before subjecting the piece to heavy use or moisture.
Can you spray paint galvanized metal without it peeling? Yes, but only with a primer specifically formulated for galvanized surfaces — standard metal primers often fail to bond to the zinc coating and will peel within weeks.
Is spray paint or a paint roller better for metal furniture? Spray paint gives a smoother, more even finish on metal furniture with curves, mesh, or ornate details, since a roller or brush struggles to reach tight contours without leaving visible strokes. For large flat metal panels, either method can work, but spray still tends to dry to a more uniform sheen.
How many coats of spray paint does metal usually need? Most metal projects need one primer coat (sometimes two thin coats for bare or rusted metal), followed by 2-3 thin coats of color, and an optional 2 coats of clear sealer. Thin, multiple coats always outperform one thick coat in both appearance and durability.
Final Thoughts
Spray painting metal comes down to one core principle: the prep work is the paint job. Rust removal, degreasing, sanding, and the right primer for your specific type of metal will do more for the final result than the paint brand you choose. Get those steps right, apply thin and even coats, and give the finish time to properly cure, and a spray-painted metal surface can look sharp and stay chip-free for years — indoors or out.
For related projects, check out our guides on spray painting plastic, choosing an adhesion promoter, and spray gun types to round out your next DIY project.