
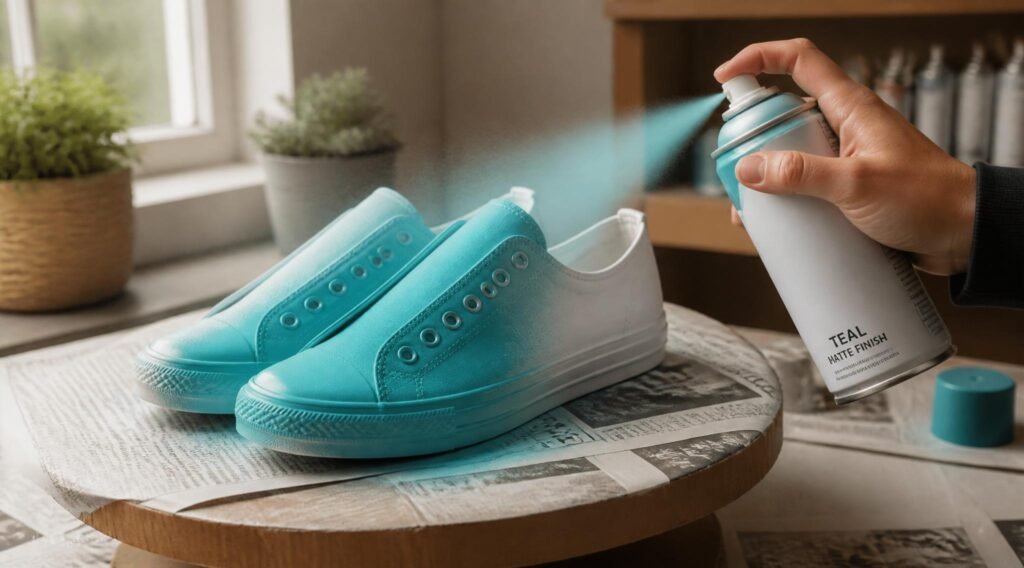
Old sneakers, scuffed leather boots, or a plain pair of canvas shoes waiting for a personal touch — spray paint is one of the fastest and cheapest ways to completely transform footwear. But shoes are not like a fence or a piece of furniture. They flex with every step, they get wet, they get scuffed against curbs, and they’re made of at least three or four different materials on a single pair. A technique that works beautifully on a wooden chair will crack and peel within a week on a sneaker.
This guide walks through exactly how to spray paint shoes so the color actually survives real-world wear — from choosing the right paint for canvas, leather, mesh, and rubber, to prepping the surface, laying down color, and sealing the finish so it doesn’t flake the first time it rains.
Why Spray Painting Shoes Is Harder Than Almost Anything Else
Most spray painting guides assume one surface. Shoes throw multiple surfaces at you simultaneously:
- Canvas or fabric uppers — porous, absorbs paint, but can also crack if you use the wrong flexible additive
- Leather or synthetic leather — smooth, low-absorbency, needs a leather-specific prep
- Mesh panels — full of tiny holes that paint can clog and stiffen
- Rubber soles and midsoles — one of the most difficult materials to get paint to stick to permanently, since it flexes constantly and resists most adhesives
This is why generic “spray paint anything” advice fails on footwear. If you’ve read our guide on how to spray paint plastic, you already know that flexible materials need flexible-rated paint or they’ll crack at the first fold. Shoes bend far more aggressively than a plastic bumper, so this rule matters even more here.
What You’ll Need
Paint & Prep Products
- Fabric-specific spray paint (for canvas/textile uppers) — look for labels that specifically say “fabric” or “textile”
- Flexible acrylic spray paint or leather paint (for leather, synthetic leather, and rubber soles)
- A flexible bonding primer or adhesion promoter (critical for rubber soles and synthetic leather)
- Isopropyl alcohol (90%+) for degreasing
- 220-grit sandpaper (for scuffing glossy leather or synthetic surfaces)
- Painter’s tape
- Clear acrylic sealant rated for flexible surfaces
Tools
- Newspaper or a drop cloth
- Shoe trees, crumpled newspaper, or plastic bags to stuff the shoes and hold their shape while painting
- Nitrile gloves
- A well-ventilated space or outdoor area
- A respirator mask rated for organic vapors
If you’re unsure which type of paint suits your project best, our guide to acrylic spray paint for beginners breaks down how acrylic formulas behave on fabric-like surfaces, which is directly relevant to canvas sneakers.
Step 1: Choose the Right Paint for Each Material
This is the step most DIYers skip, and it’s the single biggest reason shoe paint jobs fail. Don’t assume one can of spray paint will work on the whole shoe.
- Canvas sneakers (like classic low-tops): Fabric spray paint soaks into the weave and flexes with the material. Standard hardware-store spray paint sits on top of canvas, cracks, and flakes off within days.
- Leather or faux leather sneakers and boots: Use a paint specifically formulated for leather, or a flexible acrylic paint combined with a leather prep/deglazer. Leather has natural oils and a factory finish that resist standard paint without proper prep.
- Mesh panels: Use light, thin coats of fabric spray paint. Heavy coats will clog the mesh holes and make the shoe stiff or less breathable.
- Rubber soles and rand (the rubber strip around the base): This is the hardest part of the shoe to paint permanently. You need a flexible bonding primer or adhesion promoter designed for rubber and vinyl, similar to what’s recommended in our best adhesion promoter guide. Skipping this step is the number one reason sole paint jobs peel off within a week of wear.
Step 2: Clean and Degrease Completely
Shoes accumulate oils from your hands, dirt from the ground, and manufacturing residues you can’t see. Any of these will sabotage adhesion.
- Remove the laces and insoles — you’ll paint the shoe far more evenly without them in the way, and it protects them from overspray.
- Wipe the entire shoe down with a damp cloth to remove loose dirt.
- For leather, synthetic leather, and rubber soles, wipe with isopropyl alcohol to strip oils and factory dressing. Use a clean microfiber cloth and wipe in one direction — scrubbing back and forth just redistributes the contamination instead of removing it.
- For canvas, a light scrub with dish soap and water, then a full dry (at least a few hours, ideally overnight) works well since fabric holds moisture longer than leather or rubber.
- Handle the shoes with clean gloves from this point forward. Skin oils alone are enough to weaken adhesion on a freshly cleaned surface.
Step 3: Prep the Surface for Paint to Grip
- Leather and synthetic leather: Lightly scuff any glossy factory finish with 220-grit sandpaper. You’re not trying to remove material, just breaking the shine so paint has something to physically grip onto.
- Rubber soles: Scuff lightly, clean again with alcohol, then apply a flexible adhesion promoter. Let it flash off according to the product’s instructions (most need 10-20 minutes) before moving to primer or color.
- Canvas and mesh: No sanding needed — the woven texture already gives paint plenty of surface to hold onto. Just make sure it’s completely dry before you spray.
Step 4: Mask Off Everything You Don’t Want Painted
- Stuff the shoes with crumpled newspaper or plastic bags to hold their shape and keep the tongue upright.
- Tape off soles if you’re only painting the upper, or tape off the upper if you’re only painting the sole.
- Cover any logos, eyelets, or metal hardware you want to keep their original color.
- Line the inside of the shoe opening with tape or plastic to stop overspray from drifting inside.
Step 5: Apply a Flexible Primer (Where Needed)
Primer isn’t always necessary on canvas, but it matters a lot on leather and rubber. A dedicated flexible primer:
- Improves adhesion so the color coat doesn’t peel at flex points (the toe box and the crease where the foot bends)
- Evens out any texture or color differences underneath, so your final color looks consistent
- Prevents the base material from bleeding through lighter paint colors
Apply two light coats, 10-15 minutes apart, holding the can 8-10 inches from the surface. Avoid one heavy coat — it’s the fastest way to get runs on a small, detailed surface like a shoe.
Step 6: Spray the Color Coat
- Shake the can for a full minute, even longer than the label suggests — shoes have small, uneven surfaces where clumped pigment shows up immediately.
- Hold the can 8-10 inches away and keep your hand moving constantly. Starting and stopping mid-surface is what causes blotches and drips.
- Apply in thin, even passes with about 50% overlap between each pass so the coverage builds evenly.
- Let each coat reach touch-dry before adding the next — usually 10-20 minutes for fabric or acrylic-based paints, though this varies by product, so always check the can’s label.
- Plan for 3-4 light coats rather than 1-2 heavy ones. Shoes are visually up close and personal — thin coats produce a smoother, more professional finish and reduce cracking risk once you start walking in them.
- Rotate the shoe as you spray so you’re always working at a natural angle instead of spraying from awkward positions that cause uneven buildup.
If any area needs touch-up work with tighter control — like small logo areas or fine detailing — a detail spray gun or a paint pen designed for fabric/leather can fill gaps that a rattle can struggles to reach precisely. Our guide to spray gun types covers when a controlled tool like this makes more sense than an aerosol can.
Step 7: Seal the Finish
This step is what separates a paint job that survives real wear from one that flakes off in a week.
- Use a clear acrylic sealant rated for flexible surfaces — rigid clear coats crack at the same flex points the base paint does.
- Apply 2 thin coats, 10-15 minutes apart.
- Let the shoes cure fully before wearing them — 24-48 hours minimum, and longer in humid or cold conditions.
- For soles specifically, a flexible, abrasion-resistant topcoat matters even more, since soles take direct, repeated ground contact.
Step 8: Let Them Cure Before You Wear Them
It’s tempting to put freshly painted shoes on immediately, but paint that feels dry to the touch isn’t the same as paint that’s fully cured. Walking, flexing, and sweating in shoes that haven’t cured is the single most common reason a paint job that looked perfect on day one is cracking and peeling by day five.
- Wait at least 24-48 hours before wearing them casually.
- Avoid folding, twisting, or heavily flexing the toe box during this window.
- If you’re painting a special pair for an event, plan your project at least 3 full days ahead to leave a comfortable curing buffer.
Common Mistakes (and How to Fix Them)
Paint cracks at the toe crease within days of wearing: Almost always caused by using a rigid, non-flexible paint or primer on a high-flex area. Fix: strip the section back, re-prep, and repaint with a flexible-rated product specifically on the crease areas.
Paint on the rubber sole peels off in sheets: This is a prep failure, not a paint failure. Rubber needs scuffing, degreasing, and a flexible adhesion promoter before any color goes on — skipping this is the most common cause of sole paint failure.
Color looks patchy or blotchy on canvas: Usually from spraying too close, too heavy, or not shaking the can enough. Multiple thin, even coats fix this far better than trying to cover unevenness with one thick pass.
New color started bubbling under the old factory finish: This can happen with solvent-heavy paints reacting with certain synthetic uppers. If you’re not sure whether your project needs stripping first, our guide on whether you can paint over spray paint covers when it’s safe to layer new paint over an existing finish and when you need to start from bare material.
FAQ
Can I spray paint shoes without taking them apart? Yes, but remove the laces and insoles at minimum. It’s not required to fully disassemble the shoe, but those two pieces get in the way of even coverage and are easy to reattach afterward.
Will spray paint stay on canvas shoes permanently? With proper fabric-specific paint, thin coats, and a flexible sealant, the finish can last through regular wear for months, though heavy daily use will show wear faster than occasional use, just like factory dye does.
Do I need to paint the rubber sole the same way as the upper? No — soles need a completely different approach, since they’re rubber rather than fabric or leather. Use a dedicated flexible adhesion promoter and sole-rated paint rather than the same product you used on the upper.
How many cans of spray paint does one pair of shoes need? Most single-color sneaker projects use less than half a standard 12 oz can, since the surface area is small compared to furniture or larger objects. Keep the leftover can sealed for touch-ups later, since color matching a new can weeks later can be difficult.
Can I use regular acrylic craft paint spray instead of fabric-specific spray paint? It’s possible for light, decorative accents, but it won’t bond nearly as durably as a fabric-formulated spray paint on high-flex, high-wear areas like the toe box or heel.
Final Thoughts
Spray painting shoes rewards patience more than any other footwear project. The paint itself is rarely the problem — it’s almost always the prep work, the wrong paint-to-material match, or rushing the cure time that causes a paint job to fail. Clean thoroughly, match your paint to each material on the shoe, keep every coat thin, and give the sealant real time to cure before you put your shoes back into daily rotation. Do that, and a five-dollar can of paint can genuinely outperform shoes that cost five times as much.