
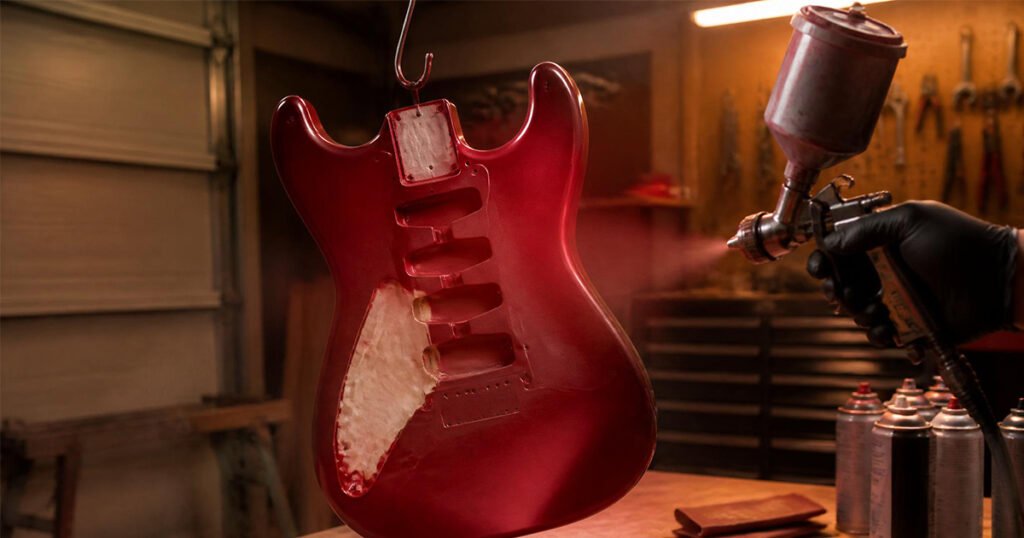
That scratched-up guitar sitting in the corner of your room, or the plain unfinished body you picked up secondhand, doesn’t have to stay that way. Learning how to spray paint a guitar is one of the most satisfying instrument projects a home DIYer can take on — it costs a fraction of a professional respray, and with the right prep and patience, you can get a finish that looks like it came out of a custom shop. This guide walks you through every stage of the process, from disassembly and sanding to color coats, clear coat, and the final buff that makes the finish glow.
Unlike painting furniture or a bike frame, a guitar body has curves, edges, routed cavities, and a neck joint that all need careful masking and technique. Get it right, and you’ll have a one-of-a-kind instrument. Get it wrong, and you risk gummy finishes, orange peel texture, or paint bridging into the electronics cavity. If you’re brand new to spray painting in general, it’s worth pairing this guide with our Spray Painting for Beginners starter guide before you begin, since the fundamentals of can control, distance, and layering apply just as much to a guitar body as they do to any other project.
Table of Contents
ToggleWhy Spray Paint Your Own Guitar?
A full professional guitar refinish at a luthier shop can easily run several hundred dollars, and that’s before you factor in wait times. Doing it yourself lets you:
- Completely customize the color, finish, or effect (solid, metallic, candy, sunburst, or even a distressed relic look)
- Save significant money compared to a shop respray
- Bring a cheap secondhand or “project” guitar back to life
- Learn a transferable skill that applies to bike frames, furniture, and other DIY builds
The tradeoff is time. A guitar refinish done properly — with adequate drying and curing time between every stage — typically takes one to two weeks from start to finish, even though your actual hands-on spraying time is only a few hours total.
Tools and Materials You’ll Need
Before you start disassembling anything, gather your supplies so you’re not stopping mid-project to run to the hardware store:
- Screwdrivers appropriate for your guitar’s hardware (Phillips and flathead)
- Sandpaper in a range of grits: 120, 220, 400, 600, 800, and 1500–2000 for wet sanding
- A tack cloth or lint-free cloths for dust removal
- Wood filler or grain filler (for open-grain woods like mahogany or ash)
- Sanding sealer or wood conditioner
- Painter’s tape and masking paper for the neck pocket, control cavity, and pickup routes
- A sanding primer/filler-primer in aerosol or gun-fed form
- Your chosen color coat (lacquer, enamel, or acrylic — more on choosing below)
- A clear coat topcoat (lacquer or urethane clear works well)
- A rotating stand, string, or hook so you can spray and dry the body without touching the wet finish
- A dust-controlled space: a garage with the door cracked, a spray booth, or a well-ventilated workshop
- A respirator rated for organic vapors, safety glasses, and nitrile gloves
If you’re deciding between a spray gun setup and rattle cans for this project, our comparison of HVLP vs airless paint sprayers is a useful reference, though for most home guitar refinishes, an HVLP gun or quality aerosol lacquer cans will both get the job done.
Step 1: Disassemble the Guitar Completely
Remove every piece of hardware you possibly can: strings, pickguard, pickups, bridge, tuning pegs, neck (if bolt-on), control knobs, and output jack. The more bare wood you expose, the cleaner and more even your finish will be. Bag and label all your screws and small parts so reassembly is painless later.
If your guitar has a set neck that can’t be removed, mask the neck joint carefully with tape and paper before you begin sanding and spraying the body.
Step 2: Strip the Old Finish
You have two main options for removing the existing finish:
- Sanding — Effective for most factory finishes, especially thin poly or lacquer coats. Start with 120-grit and work your way to smoother grits as the old finish comes off.
- Chemical stripper — Faster for thick finishes but requires good ventilation and careful masking, since strippers can damage plastic bindings or inlays if left too long.
Whichever method you choose, work down to bare wood evenly across the entire body. Any low spots or leftover finish will telegraph through your new paint job once it’s sprayed and clear-coated.
Step 3: Fill the Grain (For Open-Grain Woods)
If your guitar body is made from mahogany, ash, or another open-pore wood, the grain will show through a solid color coat unless you fill it first. Apply a grain filler with a rubber squeegee, working it into the pores, then sand back the excess once it’s dry. Guitars made from denser, tighter-grain woods like maple or basswood often don’t need this step.
Step 4: Sand Progressively and Clean the Surface
Work through your sandpaper grits in order — typically 120, then 220, then 400 — sanding with the grain and checking under raking light for scratches or dips. Once you reach 400-grit, wipe the body down thoroughly with a tack cloth to remove all dust before moving to primer. Any dust left behind will show up as tiny bumps under your color coat.
For a deeper look at exactly how surface prep affects your final finish quality across different materials, our guide on fixing spray paint drips and runs covers several prep-related causes worth understanding before your first color coat goes on.
Step 5: Apply Sanding Sealer or Primer
A sanding sealer (or a dedicated sanding primer if you’re using lacquer or enamel) does two things: it seals the wood grain so your color coat lays down evenly, and it gives you a sandable base to knock down any remaining imperfections.
- Apply 2–3 light coats of sealer or primer, allowing proper dry time between each according to the product label.
- Once fully dry, wet-sand with 400 to 600-grit sandpaper until the surface feels glass-smooth to the touch.
- Wipe down thoroughly before moving to color.
Step 6: Choose and Apply Your Color Coat
This is where your guitar’s personality comes through. A few common color coat options:
- Nitrocellulose lacquer — The traditional choice for vintage-style electric guitars. It’s easy to touch up and ages beautifully, but it takes longer to fully cure (weeks, not days).
- Acrylic lacquer or enamel — Widely available in aerosol cans, dries faster, and is more forgiving for beginners.
- Metallic or candy finishes — Require a solid base coat first, followed by a translucent color layer, then a clear protective topcoat.
Whichever paint you use, follow the same core technique: hold the can or gun 6–10 inches from the surface, use smooth overlapping passes, and build color in several thin coats rather than one heavy coat. Thin coats dry more evenly and dramatically reduce the risk of runs, drips, or a cloudy finish. If you want a refresher on can control and layering technique before you start, our Best Spray Paint Techniques for a Professional Finish guide breaks this down step by step.
Let each coat flash off (become touch-dry) before applying the next, and allow the full recommended cure time on the product label before moving to clear coat.
Step 7: Apply the Clear Coat
Once your color has fully cured, apply your clear topcoat in the same thin, overlapping passes. Plan for 3–5 light coats of clear, allowing proper dry time between each. The clear coat is what gives a guitar finish its glossy depth and protects the color beneath it from scratches, sweat, and UV fading over time.
Avoid the temptation to rush this stage — spraying a heavy clear coat before the layer beneath it has fully cured is one of the most common causes of wrinkling, cloudiness, or solvent pop (tiny bubbles trapped in the finish).
Step 8: Cure, Wet Sand, and Buff
This final stage is what separates an amateur-looking guitar finish from one that looks factory-fresh:
- Let the clear coat cure fully. Depending on the product, this can take anywhere from a few days to several weeks. Rushing this step risks sanding through a finish that isn’t fully hardened.
- Wet sand starting at 800-grit and working up through 1000, 1500, and 2000-grit, using water as a lubricant to prevent clogging your sandpaper and to keep the surface cool.
- Polish with a rubbing compound and a soft cloth or buffing wheel, working in small sections until the finish reaches a mirror-like shine.
- Final wax or polish coat to protect the finish and add extra depth to the shine.
Reassembly and Final Checks
Once your finish has fully cured and been buffed to your liking, carefully reinstall all hardware, electronics, and the neck (if removed). Check that no paint has bridged into screw holes, pickup routes, or the neck pocket — a small amount of careful cleanup with a hobby knife may be needed around these areas before everything fits back together properly.
String up the guitar, let it settle for a day, and then do a final setup: action, intonation, and pickup height, since removing and reinstalling the neck or hardware can shift these slightly.
Common Mistakes to Avoid When Spray Painting a Guitar
- Skipping grain filler on open-pore wood, which leaves a rippled, uneven color coat no matter how much clear you apply afterward.
- Spraying too heavy a coat, causing runs that are especially difficult to fix on curved guitar body edges.
- Not allowing full cure time between color and clear, which traps solvents and causes cloudiness or wrinkling.
- Forgetting to mask the neck pocket and control cavity, resulting in paint buildup that prevents hardware from seating properly.
- Wet sanding too aggressively before the finish has fully hardened, which can burn through thin areas of clear coat, especially on edges and horns.
- Ignoring ventilation and respiratory protection. Guitar bodies are sprayed at close range in enclosed spaces more often than furniture or larger projects, so proper airflow and a rated respirator matter even more here. Our full Spray Painting Safety guide covers respirator ratings, ventilation setup, and safe workspace practices in detail.
How Guitar Body Wood Affects Your Prep and Finish
Not all guitar bodies behave the same way under paint, and knowing your wood type before you start will save you time and frustration.
- Alder and basswood — Tight, closed grain that takes solid colors well with minimal filling. A popular choice for beginners because they’re forgiving to sand and finish evenly.
- Ash — Beautiful open grain that looks stunning under a translucent or “see-through” finish, but requires grain filler if you want a perfectly smooth solid color.
- Mahogany — Open-pored like ash, commonly used on set-neck guitars, and also benefits from grain filling if you’re going for a glass-smooth solid finish.
- Maple — Very tight, hard grain that’s popular for guitar tops and necks. Takes stains and translucent finishes especially well, showing off any figuring in the wood.
- Plywood or laminate bodies (common on budget or student guitars) — Sand carefully, since aggressive sanding can cut through the thin veneer layer and expose the substrate underneath.
If you’re not sure what wood your guitar body is made from, a quick test patch of grain filler on the back of the body (an area that won’t show) will tell you immediately whether the pores need filling.
Rattle Cans vs. a Spray Gun: Which Should You Use?
Both approaches can produce a professional-looking guitar finish, but they come with different tradeoffs worth considering before you commit to a method.
Aerosol rattle cans:
- Lower upfront cost and no cleanup of equipment afterward
- Widely available at hardware, automotive, and hobby stores
- Easier for a first-time project since there’s no gun pressure or fluid tip adjustment to learn
- Less control over exact coat thickness, which means paying closer attention to pass speed and distance
HVLP or gravity-feed spray gun:
- Greater control over atomization, coat thickness, and pattern width
- More economical per-project if you plan to refinish multiple guitars or other items over time
- Requires an air compressor (for most HVLP setups) and more cleanup after each session
- A steeper learning curve, but produces very consistent results once dialed in
For a single guitar project, rattle cans are a completely valid and popular choice among hobbyists. If you’re weighing the two options in more depth, our HVLP vs airless paint sprayer comparison walks through the practical differences for home use.
Troubleshooting Common Guitar Finish Problems
Even with careful prep, a few issues tend to show up repeatedly on guitar refinish projects. Here’s how to recognize and fix them:
- Orange peel texture — Usually caused by spraying too far from the surface, in conditions that are too cold, or with paint that’s too thick. Thin the paint slightly if using a gun, move closer, and maintain a warm, stable spraying environment.
- Fisheye (small craters in the wet paint) — Almost always caused by silicone or oil contamination on the surface, often from furniture polish, hand lotion, or old wax. A thorough degreasing wipe-down before spraying prevents this.
- Runs on curved edges and horns — Guitar bodies have more curved surfaces than flat furniture, and paint naturally wants to pool at edges. Apply noticeably lighter coats near horns, cutaways, and edges compared to the flat top and back.
- Cloudy or hazy clear coat — Typically caused by spraying clear before the color coat has fully cured, trapping solvents beneath the surface. Always respect full cure times listed on your product.
- Color coat lifting when clear is applied — Happens when the clear coat’s solvents are too aggressive for the color coat beneath. Always test compatibility between your specific color and clear products on a scrap piece first.
Estimated Cost of a DIY Guitar Refinish
One of the biggest advantages of doing this yourself is the cost savings compared to a professional respray, which commonly runs $300–$800 depending on the shop and finish complexity. A DIY refinish using aerosol cans typically costs:
- Sandpaper assortment: $10–$15
- Grain filler (if needed): $15–$25
- Sanding sealer or primer: $15–$25
- Color coat (2–3 cans): $20–$40
- Clear coat (2–3 cans): $20–$40
- Rubbing compound and polish: $10–$20
All told, most home guitar refinishes land somewhere between $90 and $170 in materials, plus your own time — a significant savings over a shop-quality respray, especially if you plan to refinish more than one instrument in the future.
How Long Does a Full Guitar Refinish Take?
Realistically, budget one to two weeks for a full refinish when you account for proper dry and cure times at every stage:
- Stripping and sanding: 2–4 hours of hands-on work
- Sealer/primer stage: 1–2 days including dry time
- Color coats: 1–2 days including dry time between coats
- Clear coat: 1–2 days of spraying, plus 3–14 days of full cure time depending on the product
- Wet sanding and buffing: 2–4 hours of hands-on work
Trying to compress this timeline is the single biggest reason DIY guitar refinishes end up with soft spots, wrinkling, or a finish that never quite hardens properly.
Frequently Asked Questions About Spray Painting a Guitar
Will spray painting a guitar affect its tone? For solid-body electric guitars, a properly applied finish has minimal impact on tone. Thick, heavy-handed coats can theoretically dampen resonance slightly, but thin, well-applied coats of lacquer or enamel are standard practice even on high-end factory instruments.
Can I spray paint over the original factory finish? It’s possible if the existing finish is in good, stable condition, but it’s generally not recommended. Sanding down to bare wood (or at least to a clean, scuffed base coat) gives you far better adhesion and a smoother final result than painting over an unknown factory finish.
What’s the best type of paint for a guitar body? Nitrocellulose lacquer is the traditional choice for its look and repairability, but acrylic lacquer and enamel are more beginner-friendly, dry faster, and are widely available in aerosol cans from most hardware and hobby stores.
Do I need a spray gun, or can I use rattle cans? Rattle cans work perfectly well for a guitar-sized project and are what most hobbyists use for their first refinish. A gun setup gives you more control over thickness and reduces overspray waste if you plan to refinish multiple instruments.
How many coats of clear coat does a guitar need? Most guitar finishes use 3 to 5 light coats of clear, which is enough to build sufficient thickness for wet sanding and buffing without making the finish so thick that it risks cracking or excessive weight.
Final Thoughts
Learning how to spray paint a guitar rewards patience more than any single technique. The sanding, sealing, and cure times between stages matter just as much as the spraying itself, and rushing any one of them is the most common reason home refinishes fall short of a professional look. Take your time through each stage, keep your workspace clean and well-ventilated, and use thin, even coats throughout.
Once you’re comfortable with the process, the same core skills — surface prep, thin overlapping coats, and proper cure times — carry over directly to other detailed projects on this site, including our guides on how to spray paint a bike frame and how to spray paint metal. With one successful guitar refinish under your belt, you’ll have the confidence to tackle almost any spray paint project that comes your way.