Table of Contents
ToggleHow to Spray Paint a Fence: The Complete Guide for a Flawless Finish (2026)
By Rodney Shiner | Application Guides | Updated June 2026
A tired, peeling, sun-bleached fence can drag down the entire look of your outdoor space — but repainting it by hand with a brush or roller is one of the most time-consuming DIY jobs there is. Every slat, every gap, every grain: hours and hours of back-and-forth brushwork that still somehow ends up looking uneven.
There is a better way. Learning how to spray paint a fence properly transforms what used to be a full weekend slog into a single afternoon project — with a smoother, more even finish than brush or roller painting could ever achieve.
In this complete guide, you will learn everything you need to know: how to choose the right equipment and paint, how to prepare your fence properly, how to spray efficiently without drips or overspray, and how to protect your finish so it lasts for years outdoors.
Table of Contents
- Why Spray Paint a Fence Instead of Brushing?
- What You Need: Equipment and Materials
- Choosing the Best Spray Paint for a Fence
- Step 1 — Prepare the Area Around the Fence
- Step 2 — Clean and Prepare the Fence Surface
- Step 3 — Repair Damaged Areas
- Step 4 — Prime the Fence (When and Why)
- Step 5 — How to Spray Paint a Fence Correctly
- Step 6 — Apply a Second Coat
- Step 7 — Seal and Protect the Finish
- How to Spray Paint a Wood Fence
- How to Spray Paint a Metal Fence
- How to Spray Paint a Vinyl or PVC Fence
- Common Spray Painting Fence Mistakes to Avoid
- Frequently Asked Questions
1. Why Spray Paint a Fence Instead of Brushing? {#why-spray}
Before we get into the technique, let us talk about why spray painting is almost always the superior choice for fence projects.
Speed
A fence with 40–50 individual slats could take 6–8 hours to paint by brush. With a spray gun or even a quality aerosol, the same fence can be coated in 1–2 hours. For longer fences, the time savings are even more dramatic.
Coverage
Brushes and rollers struggle with the gaps, edges, and textured grain of a typical fence. Spray paint wraps around slats, gets into every crevice, and covers both front and back faces of pickets in a single pass — something a brush simply cannot do efficiently.
Finish Quality
Spray painting, when done correctly, delivers a smooth, factory-like finish with no brush marks, no lap lines, and no bristle streaks. It also applies paint more uniformly, which means more consistent color coverage and better protection.
Coverage of Difficult Surfaces
Lattice panels, wrought iron fences, rustic split-rail fences, and ornamental designs are extremely tedious to paint by brush. Spray painting handles them effortlessly.
The trade-off is preparation — you need to protect surrounding areas from overspray. But with the right setup, this takes just minutes and is entirely worth it.
2. What You Need: Equipment and Materials {#equipment}
Here is a complete list of what you will need before you start:
Spray Equipment Options
Option A — Airless Paint Sprayer (Best for large fences) An airless sprayer is the most efficient tool for painting a full fence. It handles thick paints, covers large areas fast, and gives the most professional result. Recommended for fences longer than 10–15 meters.
Option B — HVLP Spray Gun (Best for smaller or detailed fences) High-Volume Low-Pressure (HVLP) guns produce less overspray than airless sprayers and give more control. Ideal for ornamental metal fences, wrought iron, or fence sections near delicate plants or structures.
Option C — Aerosol Spray Cans (Best for small sections or touch-ups) For short sections, gates, or detailed metalwork, aerosol cans are perfectly adequate. They require no equipment setup and are easy to control. Less economical for large areas, but extremely convenient for smaller jobs.
Other Materials You Will Need
- Drop cloths or plastic sheeting (to protect plants, grass, and paving)
- Painter’s tape (for masking posts, walls, or edges)
- Wire brush or stiff-bristle brush (for cleaning the fence)
- Sandpaper — 80 grit and 120 grit
- Exterior-grade primer (for bare wood or bare metal)
- Exterior fence paint or spray paint in your chosen color
- Clear topcoat or sealer (optional but recommended)
- Safety respirator rated for paint fumes (not just a dust mask)
- Safety goggles
- Nitrile gloves
- Old clothes or a painter’s suit
To understand which safety equipment you actually need and why it matters, read our full guide on Spray Painting Safety: Everything You Need to Know to Stay Safe.
3. Choosing the Best Spray Paint for a Fence {#choosing-paint}
The paint you choose will largely determine how long your fence finish lasts — and how it handles the outdoor conditions it will face year-round.
For Wooden Fences
Look for exterior-grade acrylic latex paint or exterior wood stain with built-in UV protection. Key features to look for:
- UV resistance: Outdoor paint fades fast without UV inhibitors. Look for “UV-resistant” or “fade-resistant” on the label.
- Water resistance: The paint must be waterproof or highly water-resistant for outdoor use.
- Mildew resistance: Damp climates and shaded fences are prone to mould and mildew. Choose a paint with mildew inhibitors.
- Flexibility: Wood expands and contracts with temperature. A flexible paint formula prevents cracking and peeling.
Finish options for wood fences:
- Flat/matte — natural, low-glare look; hides imperfections well but less durable
- Satin — best balance of durability and appearance; easiest to clean; most popular choice
- Semi-gloss — more durable but shows every imperfection clearly
For Metal Fences
Metal fences need rust-inhibiting spray paint designed specifically for metal. Without rust protection, even a beautifully painted metal fence will develop rust blisters within months.
Look for products labeled “direct-to-metal” (DTM) or “rust-inhibiting.” Rust-Oleum and Krylon both make excellent aerosol options for metal fences. For larger metal fences, a DTM paint in an airless sprayer is the most efficient approach.
For a detailed breakdown of metal spray paint options, read our guide on Best Spray Paint for Metal in 2026: Top Picks for Every Job.
For Vinyl / PVC Fences
Vinyl is notoriously difficult to paint — standard paint peels straight off. You need a paint specifically formulated for plastic and vinyl, or a paint containing bonding agents. Always prime with a plastic bonding primer first.
Color Considerations
Dark colors absorb heat and can cause wood to expand and contract more aggressively, potentially shortening paint life. Lighter colors reflect heat and tend to last longer on wood fences. That said, modern exterior paint formulations handle dark colors better than ever — just be prepared to touch up dark-painted wood fences slightly more often.
For guidance on how to choose the right product for your specific project, see our article on How to Choose the Right Spray Paint for Any Project.
4. Step 1 — Prepare the Area Around the Fence {#prepare-area}
Before a single drop of paint touches the fence, you need to protect everything around it. Overspray travels much further than you expect, especially in light breeze conditions.
Protect Plants and Grass
Lay heavy plastic sheeting or drop cloths on the ground along the fence on both the spray side and the overspray side. Use stakes or rocks to hold the sheeting in place. Even a light overspray of paint on lawn grass can kill it.
For shrubs or plants growing against the fence, gently tie them back away from the fence and cover with old sheeting or bin bags.
Protect Hard Surfaces
Driveways, patios, and pavers near the fence should be covered with drop cloths. Paint overspray on concrete or paving is extremely difficult to remove.
Protect Adjacent Structures
If the fence runs along a wall, outbuilding, or garage, mask the area where the fence meets the structure with painter’s tape and paper or plastic.
Wind Direction
Always check the wind direction before you start spraying. Work with the wind at your back — spray in the direction the wind is blowing. Never spray into the wind, as overspray will blow back onto you and onto surfaces you have already painted.
For more outdoor spraying advice, read our guide on How to Spray Paint Outdoors: Tips for Weatherproof Results.
5. Step 2 — Clean and Prepare the Fence Surface {#prepare-fence}
Surface preparation is the single most important step in the entire process. Paint applied to a dirty, flaky, or greasy fence will not bond properly — no matter how good the paint is.
Remove Old Loose Paint
Use a stiff wire brush or paint scraper to remove all peeling, bubbling, or loose paint. You do not need to strip every trace of old paint if it is firmly adhered — only remove what is loose.
Clean the Fence
Wash the entire fence with a solution of warm water and mild detergent, scrubbing with a stiff brush to remove dirt, algae, bird droppings, and general grime. For heavily soiled fences, a pressure washer makes this step much faster and more effective.
Allow the fence to dry completely before proceeding — at least 24–48 hours in typical outdoor conditions, or longer in cool or humid weather. Painting over damp wood is one of the most common reasons fence paint peels.
Sand the Surface
Sand the fence surface to:
- Knock down any rough grain on wood
- Remove light rust from metal
- Create a “tooth” for the paint to bond to
Use 80 grit for rough or weathered surfaces, then follow up with 120 grit for smoothing. Wipe away all sanding dust with a damp cloth before painting.
Remove Rust (Metal Fences)
For metal fences, remove all visible rust with a wire brush, angle grinder with a wire wheel, or sandpaper before painting. Rust left under paint will continue to spread beneath the surface and cause the finish to fail.
6. Step 3 — Repair Damaged Areas {#repair}
Before painting, take time to repair any damage to the fence structure.
For Wood Fences
- Split or cracked boards: Fill with exterior wood filler, allow to dry fully, then sand smooth.
- Loose nails or screws: Hammer nails back in or replace with screws for a more secure hold. Countersink screw heads and fill with wood filler.
- Rotted sections: Cut out and replace rotted boards — paint will not stabilize rotted wood. Painting over rot simply seals moisture in and accelerates deterioration.
For Metal Fences
- Rust pits: Treat with a rust converter product, which chemically neutralizes rust and converts it to a stable compound that can be painted over.
- Bent bars or damaged sections: Straighten or replace before painting.
7. Step 4 — Prime the Fence (When and Why) {#primer}
Priming is a step many DIYers skip — and it is why their paint peels within a year.
When to Prime
Always prime when:
- Painting bare wood (new fence or fully stripped fence)
- Painting bare metal
- Switching from a dark color to a significantly lighter one
- Painting after repairs (filler spots must be primed)
- Painting vinyl or plastic (use a bonding primer)
You can skip primer when:
- Applying a fresh topcoat over existing paint in good condition and a similar color
- Using a paint-and-primer-in-one product (though dedicated primer is always better)
Which Primer to Use
- Wood fences: Exterior oil-based primer (best adhesion) or water-based exterior primer (quicker drying, easier cleanup)
- Metal fences: Rust-inhibiting metal primer — essential for preventing rust bleed-through
- Vinyl/PVC: Plastic bonding primer — without this, paint will not stick
Apply primer with your spray equipment using the same technique as the topcoat. Allow primer to dry fully before applying paint (check the product label — typically 1–4 hours for water-based, 8–24 hours for oil-based).
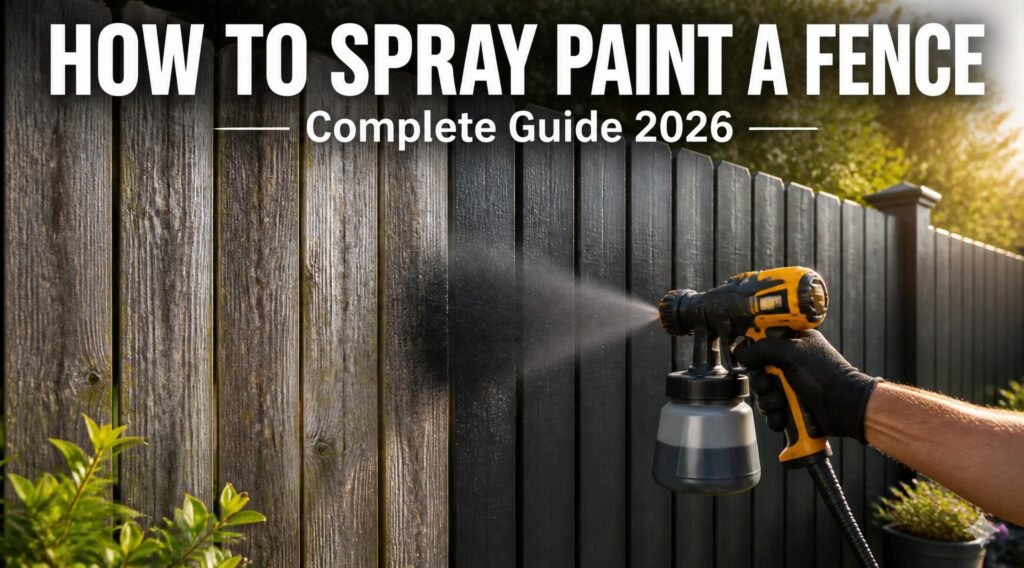
8. Step 5 — How to Spray Paint a Fence Correctly {#spraying}
This is the heart of the process. Good spray technique makes the difference between a flawless finish and a patchy, drip-covered mess.
Set Up Your Sprayer
- Strain your paint: Pour paint through a paint strainer into the sprayer cup or hopper. Clumps in paint clog spray tips and create spitting.
- Thin if necessary: Check your sprayer’s instructions. Some sprayers require paint to be thinned slightly for proper atomization — check the paint manufacturer’s guidance for the correct thinner and ratio.
- Test on cardboard first: Before touching the fence, spray onto a piece of cardboard to check your spray pattern is even, the fan width is appropriate, and there are no spitting or clogging issues.
Spray Distance and Speed
- Distance: Hold the spray tip 10–12 inches (25–30 cm) from the surface for most sprayers. Closer = heavier, wetter coats prone to drips. Further = thin, dusty finish with poor coverage.
- Speed: Move your arm at a consistent, smooth speed — roughly 12–18 inches per second. Too slow = drips and runs. Too fast = thin, uneven coverage.
Spray Motion
Always spray in straight, parallel passes — either side to side or top to bottom. Never arc your wrist, as this changes the spray distance mid-pass, causing heavier coverage in the centre and lighter edges.
Overlap each pass by 50% — this ensures no gaps or lines between passes.
For a vertical slat fence, work top to bottom in vertical passes. For a horizontal board fence, work in horizontal passes.
Thin Coats, Not One Heavy Coat
Apply two thin coats rather than one heavy coat. A heavy coat is the number one cause of drips, runs, and uneven drying. Thin coats dry faster, adhere better, and produce a smoother finish.
Spray Both Sides
For best protection, spray both the visible side and the back of the fence. The back face is constantly exposed to ground moisture and is often where rot and rust begin.
Keep a Wet Edge
Work section by section without stopping mid-panel. Stopping and restarting while one end dries creates visible overlap lines. Complete each full section (panel or run of boards) before stepping back.
To understand how to avoid the most common errors in technique, read our guide on 10 Common Spray Paint Mistakes (And How to Fix Every One of Them).
9. Step 6 — Apply a Second Coat {#second-coat}
Once the first coat is fully dry — touch dry is not enough; wait for full recoat time as listed on the paint label (typically 2–4 hours for water-based, 24 hours for oil-based) — apply your second coat.
The second coat:
- Fills any thin spots or missed areas from the first pass
- Deepens the color
- Significantly improves durability and weather resistance
- Produces a far more professional result
Use the same technique as the first coat. Two thin coats always outperform one thick coat.
For very weathered or thirsty wood surfaces, a third coat may be beneficial — but ensure each coat is fully dry before the next.
10. Step 7 — Seal and Protect the Finish {#sealing}
For maximum durability on outdoor fences, a clear protective topcoat is highly recommended — especially for wood fences in exposed positions.
Clear Exterior Topcoat / Sealer
A clear exterior sealer applied over your topcoat provides:
- UV protection (slows fading)
- Water repellency (prevents moisture penetration)
- Resistance to dirt and algae
- A harder, more impact-resistant surface
Apply with the same spray technique once the final topcoat is completely dry (usually 24–48 hours). Use a clear exterior varnish, polyurethane, or specifically formulated fence sealer.
When You Can Skip the Sealer
Some high-quality exterior paints already include UV inhibitors and water-resistant chemistry built in. If you are using a premium exterior fence paint, a separate sealer may be optional rather than essential. Check the product specifications.
11. How to Spray Paint a Wood Fence {#wood-fence}
Wood is the most common fence material and responds beautifully to spray painting when properly prepared.
Key Considerations for Wood
- Grain direction: Spray parallel to the grain where possible for the most natural-looking finish.
- Knots: Seal knots with a shellac-based or stain-blocking primer before painting. Unsealed knots bleed resin through paint, causing yellow or brown staining.
- New wood: New, pressure-treated timber must be allowed to weather for 3–6 months before painting, as preservative chemicals prevent paint adhesion. Alternatively, use a paint specifically formulated for fresh pressure-treated timber.
- Previously stained wood: Solid stains can be painted over. Semi-transparent stains must be fully stripped or they will bleed through.
For detailed guidance on spray painting timber, read our full article on How to Spray Paint Wood: The Complete Guide to a Smooth, Professional Finish.
12. How to Spray Paint a Metal Fence {#metal-fence}
Wrought iron, steel, and aluminum fences each have slightly different requirements.
Wrought Iron and Steel Fences
The biggest enemy is rust. Every step of preparation and priming is critical:
- Remove all rust mechanically (wire brush, angle grinder, or sandpaper)
- Treat remaining rust stains with rust converter
- Prime with a quality rust-inhibiting metal primer
- Apply two coats of direct-to-metal paint or rust-inhibiting topcoat
- Seal with a clear exterior topcoat for maximum protection
HVLP spray guns are particularly effective for ornamental ironwork, as they give you the control to coat the intricate shapes and gaps without excessive overspray.
Aluminum Fences
Aluminum does not rust, but it oxidizes — forming a dull grey layer that prevents paint adhesion. Always sand aluminum lightly to remove oxidation before priming. Use a self-etching primer formulated for aluminum before your topcoat.
For a comprehensive look at metal-specific painting techniques, read our guide on How to Spray Paint Metal: The Complete Guide.
13. How to Spray Paint a Vinyl or PVC Fence {#vinyl-fence}
Vinyl fences are low-maintenance but notoriously difficult to paint. Standard paint has almost no adhesion to smooth vinyl surfaces.
The Right Approach for Vinyl
- Clean thoroughly with TSP (trisodium phosphate) solution to degrease the surface completely.
- Scuff the surface lightly with 220-grit sandpaper — do not sand heavily, just enough to dull the gloss.
- Apply a quality plastic/vinyl bonding primer and allow to dry fully.
- Apply a flexible, acrylic topcoat formulated for plastic or vinyl.
- Do not use oil-based paints — they are too rigid for vinyl’s natural flex and will crack.
The critical rule with vinyl: never paint vinyl a darker color than the original. Darker vinyl absorbs significantly more heat, which causes warping and buckling.
For more detail on working with plastic surfaces, see our guide on How to Spray Paint Plastic: The Complete Guide to a Finish That Actually Sticks.
14. Common Spray Painting Fence Mistakes to Avoid {#mistakes}
❌ Skipping Surface Preparation
The most common and most damaging mistake. Paint applied to a dirty, damp, or flaky surface will peel within weeks. Always clean, repair, and prime before painting.
❌ Painting in Wet or Windy Conditions
High humidity prevents proper drying and adhesion. Wind causes overspray on unintended surfaces and creates a dusty, dry finish. Always spray in calm, dry conditions — ideally 50°F–85°F (10°C–29°C) with humidity below 70%.
❌ Spraying Too Close or Too Far
Too close: heavy, wet coats that run and drip. Too far: thin, dusty coverage that does not bond properly. Maintain a consistent 10–12 inch distance.
❌ Moving Too Slowly
Slow passes deposit too much paint in one area, causing runs and drips. Keep your arm moving at a consistent pace and let two thin coats build coverage rather than trying to do it in one pass.
❌ Forgetting the Back Face
The back of a fence is constantly exposed to ground moisture, making it actually more vulnerable than the visible front. Always coat both sides for complete protection.
❌ Not Cleaning the Sprayer Immediately After Use
Paint left in a sprayer can dry and clog it permanently. Always flush your sprayer immediately after finishing with the appropriate solvent (water for water-based paints, mineral spirits for oil-based).
❌ Painting in Full Sun
Painting in direct hot sun causes paint to dry too quickly — before it has time to properly level and bond. This causes surface cracking and poor adhesion. Paint in the shade or during cooler parts of the day — early morning is ideal.
15. Frequently Asked Questions {#faq}
How long does spray-painted fence paint last?
A properly prepared and painted fence with two topcoats and a clear sealer should last 4–7 years before needing repainting, depending on the climate, sun exposure, and quality of paint used. Wood fences in exposed, sunny positions may need repainting every 3–5 years.
Do I need to prime a fence before spray painting?
Yes — in almost all cases. Priming is essential for bare wood, bare metal, and any fence that has been repaired or stripped. Only skip primer when recoating an existing, well-adhered paint layer in a similar color.
Can I use a regular aerosol can to paint a fence?
For small sections, gates, or touch-ups, yes. For a full fence, aerosol cans are not practical or economical. An airless sprayer or HVLP gun is far more efficient for anything larger than a few square meters.
How do I prevent overspray from reaching my neighbor’s property?
Set up drop cloths or plastic sheeting on the other side of the fence to catch overspray. Always check wind direction and spray with the wind at your back. Never spray on a windy day.
What temperature is too cold to spray paint a fence?
Most exterior paints should not be applied below 50°F (10°C). Below this temperature, paint does not cure properly and adhesion is poor. Check the paint label for the specific manufacturer’s minimum application temperature.
How long should I wait between coats?
Typically 2–4 hours for water-based paints and 24 hours for oil-based paints — always check the specific product label. Applying a second coat too soon traps solvents under the surface and causes bubbling and poor adhesion.
Can I spray paint a fence without removing the old paint?
Yes — if the existing paint is in good condition (no peeling, bubbling, or cracking). Sand lightly to create adhesion, clean the surface, and apply your new topcoat. If the old paint is failing, it must be removed first.
Final Thoughts: How to Spray Paint a Fence Like a Pro
Learning how to spray paint a fence is one of the most satisfying DIY upgrades you can make to your outdoor space. Done correctly, it transforms a weathered, dated fence into a sharp, fresh boundary that looks professionally finished — and costs a fraction of replacement or hiring a painter.
The keys to success are always the same: prepare the surface thoroughly, choose the right paint and primer for your fence material, spray with consistent technique in two thin coats, and protect the finish with a sealer for lasting results.
Master those steps and your fence finish will look great season after season.
Ready to Take Your Spray Painting Further?
- 🎨 How to Spray Paint a Wall: Complete Step-by-Step Guide
- 🪑 The Ultimate Guide to Spray Painting Furniture
- 🚗 How to Spray Paint a Car at Home: A Realistic Step-by-Step Guide
- 🔧 10 Common Spray Paint Mistakes (And How to Fix Every One of Them)
- 🌿 How to Spray Paint Outdoors: Tips for Weatherproof Results
Happy painting! 🎨
Author: Rodney Shiner Rodney Shiner is a professional spray painter and the founder of Spray Painter Guide. He shares expert techniques, product reviews, and step-by-step tutorials to help both beginners and experienced painters achieve professional results.
© 2026 Spray Painter Guide. All rights reserved.