
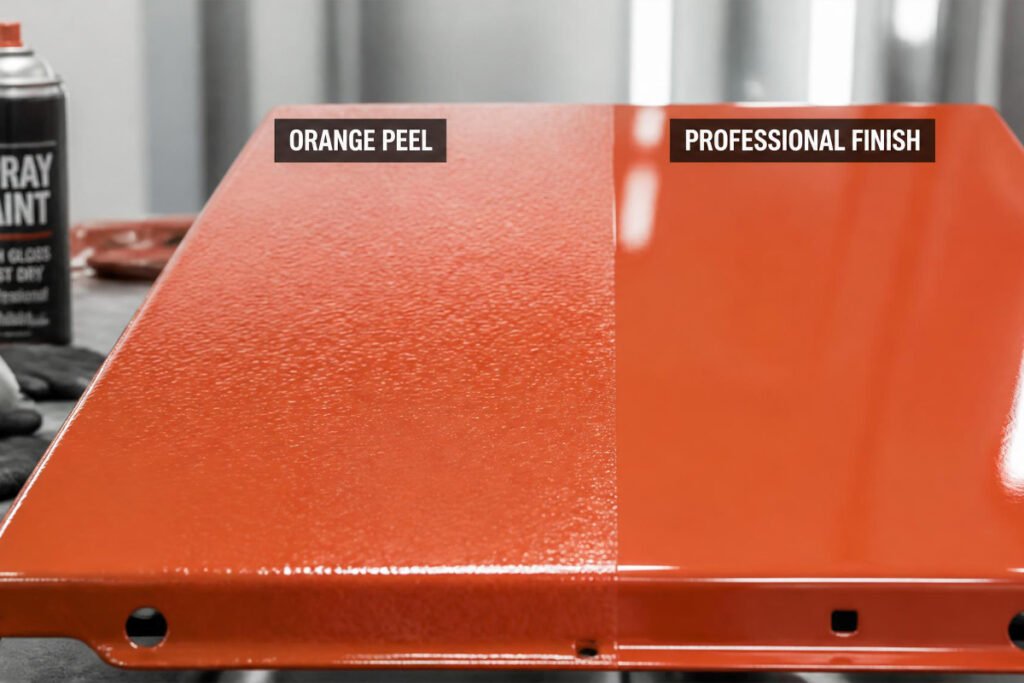
You finish spraying your project, step back, and expect a smooth, glossy surface. Instead, the paint looks rough and uneven, almost like the skin of an orange.
That frustrating texture is known as spray paint orange peel.
It is one of the most common finish problems DIY painters encounter. The good news is that orange peel usually does not mean your entire project is ruined. In many cases, you can correct the surface with the right combination of drying time, sanding, application technique, and another controlled coat of paint.
Orange peel happens when sprayed paint does not flow and level properly before it dries. The exact reason can vary. You may have sprayed from too far away, applied the wrong amount of material, worked in unsuitable temperatures, used an incorrect spray setting, or allowed the surface to dry too quickly.
The fundamentals are covered in the site’s professional spray-paint techniques guide and beginner spray-paint guide, but this article focuses specifically on diagnosing and fixing orange peel.
Whether you’re painting metal, wood, plastic, furniture, cabinets, walls, or automotive panels, the same basic principle applies: **the paint needs to reach the surface in a controlled, properly atomized layer and have enough time to level before it dries.**
In this guide, you’ll learn exactly what causes spray paint orange peel, how to repair it without unnecessarily stripping your project, and how to prevent the problem on your next coat.
—
Quick Answer: Why Does Spray Paint Get Orange Peel?
**Spray paint orange peel happens when the wet paint droplets fail to flow together and level into a smooth film before drying.** Common causes include spraying too far from the surface, using excessive or insufficient material, incorrect spray settings, unsuitable temperature or humidity, poor atomization, improper paint viscosity, and applying another coat at the wrong time.
For a small affected area, allow the paint to cure according to the product instructions, then lightly sand the texture and refinish it. For severe orange peel, sand the surface progressively smoother before applying controlled, thin coats.
The most important prevention rule is simple: maintain a consistent spraying distance, move at a steady speed, overlap your passes evenly, and follow the manufacturer’s temperature and recoat instructions.
The site’s existing guide notes that approximately 10–12 inches is a common spray distance for many spray applications and warns that spraying too far can create dry, textured coverage.
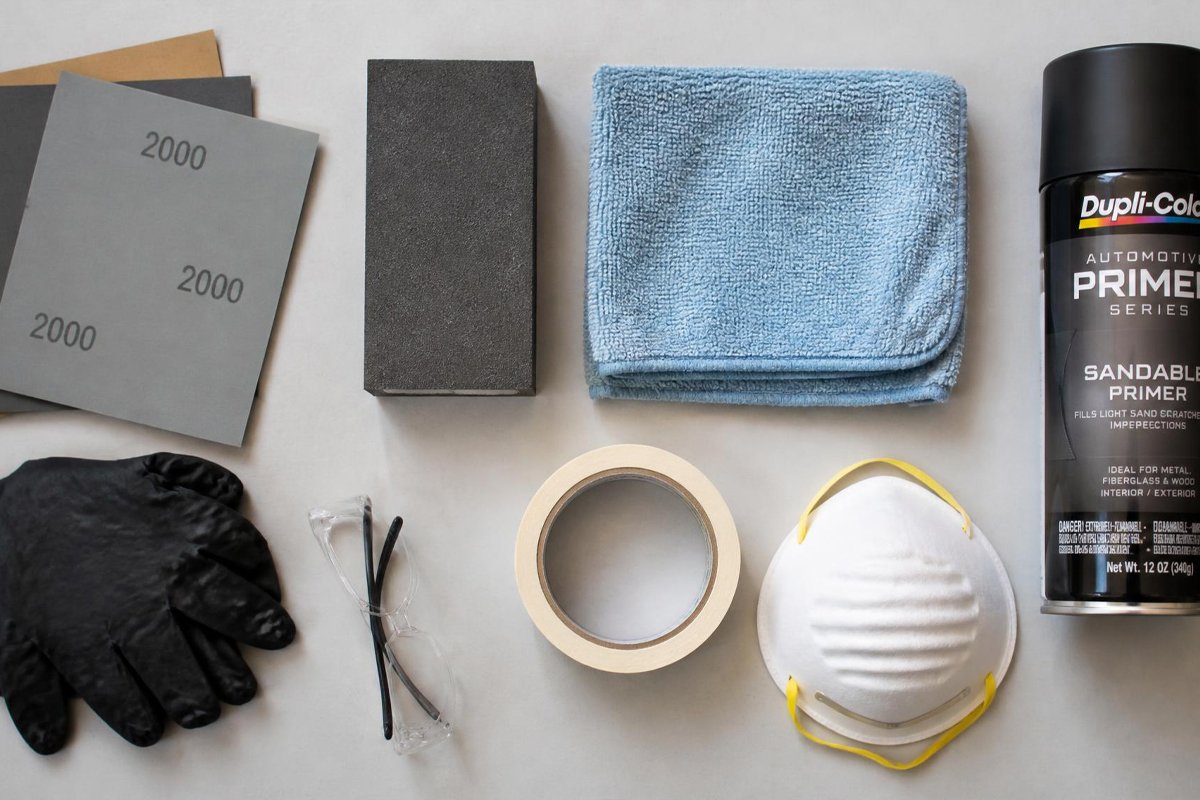
Table of Contents
1. [What Is Spray Paint Orange Peel?](#what-is-spray-paint-orange-peel)
2. [What Causes Spray Paint Orange Peel?](#what-causes-spray-paint-orange-peel)
3. [How to Choose the Right Fix](#how-to-choose-the-right-fix)
4. [7 Ways to Fix Spray Paint Orange Peel](#7-ways-to-fix-spray-paint-orange-peel)
5. [Best Fix for Different Surfaces](#best-fix-for-different-surfaces)
6. [How to Prevent Orange Peel](#how-to-prevent-orange-peel)
7. [How to Apply Spray Paint Correctly](#how-to-apply-spray-paint-correctly)
8. [Common Mistakes](#common-mistakes)
9. [Expert Tips](#expert-tips)
10. [Final Verdict](#final-verdict)
11. [Frequently Asked Questions](#frequently-asked-questions)
—
What Is Spray Paint Orange Peel?
Spray paint orange peel is a textured finish where the painted surface develops small waves, bumps, or dimples instead of becoming smooth and level.
The name comes from its resemblance to the surface of an orange.
Unlike a drip or run, orange peel usually doesn’t look like a large amount of paint has simply flowed downward. Instead, the surface appears uniformly rough or slightly pebbled.
This happens because the tiny paint droplets created during spraying don’t fully merge into one smooth film before the solvents evaporate.
A perfect spray-painted finish depends on several things working together:
* Correct paint viscosity
* Proper atomization
* Correct spray distance
* Consistent movement
* Appropriate coating thickness
* Suitable temperature
* Suitable humidity
* Correct drying and recoat timing
* Proper surface preparation
The site’s professional technique guide specifically identifies poor technique as a major contributor to drips, orange peel, and streaks.
Orange peel can occur with both aerosol cans and spray guns. It can also appear on almost any paintable surface.
However, the severity and best repair method can change depending on whether you’re working on wood, plastic, metal, furniture, or an automotive panel.
—
What Causes Spray Paint Orange Peel?
Before fixing orange peel, identify the cause. Otherwise, you may sand the surface smooth and simply create the same problem again on the next coat.
1. Spraying Too Far Away
When the nozzle or spray gun is held too far from the surface, the paint droplets travel through the air for longer.
More solvent can evaporate before the droplets reach the surface.
The result is often a dry, rough texture rather than a wet film that can flow together.
The Spray Painter Guide recommends roughly 10–12 inches as a practical distance for many spray applications.
2. Spraying Too Close
Being too close creates the opposite problem.
Too much wet material reaches a small area at once. That can cause:
* Runs
* Sags
* Uneven gloss
* Heavy edges
* Slow curing
The solution isn’t simply to move closer or farther away randomly. Maintain a consistent distance throughout every pass.
3. Moving Too Quickly
If you move the spray can or gun too quickly, insufficient material reaches the surface.
The coat may become dry and grainy instead of wet enough to level.
This is especially noticeable on large flat panels where the finish needs to remain visually consistent from one side to the other.
4. Moving Too Slowly
Moving too slowly can overload the surface.
Instead of a controlled film, you create excessive wetness that may sag, run, or remain soft for too long.
5. Incorrect Paint Viscosity
For spray-gun applications, paint that is too thick may not atomize correctly.
Instead of producing a fine, consistent spray pattern, the equipment may produce larger droplets that don’t level properly.
Always follow the coating manufacturer’s reduction or thinning instructions rather than guessing.
6. Incorrect Temperature
Temperature significantly affects how paint behaves.
Cold conditions can slow evaporation and curing. Excessive heat can accelerate solvent evaporation before the coating has time to level.
The site’s spray-paint guidance recommends following the manufacturer’s specified application temperature range rather than treating every paint as if it behaves identically.
7. Direct Sunlight
Direct sunlight can heat the painted surface and accelerate solvent evaporation.
The site’s outdoor spray-painting guide specifically warns that direct sun can cause paint to dry too quickly and produce rough, orange-peel texture.
—
How to Choose the Right Fix
Before touching the surface, ask three questions.
Is the orange peel mild or severe?
If the texture is minor, you may only need light sanding followed by another controlled coat.
If the surface is heavily textured, more aggressive sanding and refinishing may be necessary.
Has the paint cured?
Don’t immediately sand fresh paint simply because the texture looks wrong.
Fresh paint can be soft underneath even when the surface feels dry. Follow the product’s curing and recoating instructions.
The site’s paint-selection guide correctly distinguishes between **touch-dry, recoat time, and full cure**. Those are not interchangeable.
Is the underlying surface properly prepared?
If the problem is actually caused by rough substrate, contamination, poor adhesion, or incompatible materials, spraying another coat won’t solve it.
For example, plastic requires different preparation from wood or metal. The site’s plastic spray-paint guide explains why non-porous plastic can require specialized preparation and adhesion-promoting products.
—
7 Ways to Fix Spray Paint Orange Peel
1. Allow the Paint to Cure Properly
The first fix is often the hardest one for impatient DIY painters: **wait**.
If the paint is still soft, sanding it can make the situation worse. You may create scratches, smear partially cured material, or remove more paint than necessary.
Check the product label for:
* Touch-dry time
* Recoat time
* Handling time
* Full cure time
These times vary significantly by formulation, temperature, humidity, coating thickness, and manufacturer.
Don’t assume that because the surface feels dry, it is ready for aggressive sanding.
Once the paint has cured adequately, evaluate the texture again.
If the orange peel has reduced naturally as the coating levels and cures, you may need less correction than you initially expected.
—
2. Lightly Sand the Orange Peel
For mild to moderate orange peel, sanding is usually the most practical repair method.
Use appropriate fine abrasive paper and sand carefully.
The objective isn’t to remove all the paint.
You’re trying to knock down the high points of the texture and create a uniformly smooth surface for the next coat.
A good general process is:
1. Make sure the coating is sufficiently cured.
2. Clean away dust and loose contamination.
3. Start with a suitable fine abrasive.
4. Sand evenly rather than concentrating on isolated spots.
5. Check the surface frequently.
6. Progress to a finer abrasive when necessary.
7. Remove sanding residue before refinishing.
Be particularly careful around corners and edges. Paint films are usually thinner there, so aggressive sanding can expose the substrate.
If you expose bare material, don’t simply bury it under a heavy topcoat. Prepare the area appropriately before continuing.
—
3. Correct Your Spray Distance
If the surface repeatedly develops orange peel after refinishing, change your application technique.
For many aerosol applications, approximately 10–12 inches is a useful starting point, but the manufacturer’s instructions should take priority.
The important thing isn’t memorizing one exact number.
It’s consistency.
If you’re 8 inches away at the beginning of the pass, 14 inches in the middle, and 6 inches at the end, the paint film will vary across the surface.
Keep your hand or spray gun moving parallel to the surface.
Don’t swing your wrist in an arc.
A consistent distance produces a much more consistent coating.
—
4. Improve Your Spray Pattern
Poor atomization can create an orange-peel finish even when your distance is correct.
With a spray gun, check:
* Fluid setting
* Air pressure
* Nozzle size
* Paint viscosity
* Spray pattern
* Gun cleanliness
A partially blocked nozzle can distort the pattern and produce uneven droplets.
Clean equipment is especially important when using spray guns.
For aerosol cans, shake the can thoroughly according to the label and periodically during use.
Poorly mixed paint can spray inconsistently because the pigment and other components aren’t evenly distributed.
—
5. Apply Thinner, More Controlled Coats
A common reaction to orange peel is to add more paint.
That’s usually the wrong response.
Instead, focus on controlled coats.
A thin, even coat gives the paint a better chance to level without producing runs or trapping excessive solvent.
The site’s adhesion guide recommends multiple thin coats rather than one heavy coat and advises maintaining approximately 10–12 inches of distance while spraying.
A practical sequence is:
**Light coat → appropriate wait → second controlled coat → evaluate → final coat if needed.**
Don’t keep spraying simply because the surface doesn’t look perfect immediately after the first pass.
The final appearance can change significantly as the coating levels and cures.
—
6. Control Temperature, Humidity, and Air Movement
Environmental conditions can make an otherwise good technique fail.
Before spraying, check:
* Air temperature
* Surface temperature
* Humidity
* Wind
* Direct sunlight
* Dust levels
Outdoor painting is particularly challenging because wind can accelerate drying and carry dust into wet paint.
If you’re painting outdoors, choose a calm, shaded period when conditions fall within the product’s recommended range.
Avoid spraying directly under intense sunlight.
For indoor work, ventilation is critical. The EPA recommends increasing ventilation when using products that emit VOCs and following the product label’s precautions.
For professional spray operations, OSHA also emphasizes appropriate ventilation and respiratory protection based on the materials and work environment.
—
7. Sand and Respray the Entire Panel When Necessary
Sometimes spot repair isn’t enough.
If orange peel is severe or uneven across a large surface, trying to correct individual patches can create visible differences in texture and gloss.
In that situation:
1. Allow the coating to cure.
2. Sand the affected surface evenly.
3. Remove sanding dust.
4. Inspect the surface under good lighting.
5. Correct any remaining defects.
6. Reapply primer if necessary.
7. Apply the topcoat using consistent technique.
8. Allow appropriate drying and curing time.
For automotive panels, large furniture surfaces, doors, and other visually important pieces, uniform preparation is often more important than saving a few minutes.
Best Fix for Different Surfaces
Wood
Wood can develop texture for reasons beyond spray technique.
Raw wood is porous and can absorb material unevenly. Grain, old finishes, filler, and primer quality all influence the final result.
Before correcting orange peel on wood:
* Make sure the substrate itself is smooth.
* Sand raised grain and imperfections.
* Use an appropriate primer when necessary.
* Remove dust thoroughly.
* Apply controlled coats.
Metal
Metal can produce an excellent smooth finish, but contamination, rust, poor primer selection, and incorrect technique can create problems.
If the orange peel is on metal:
* Allow the paint to cure.
* Sand the texture evenly.
* Remove all dust.
* Check whether primer is still intact.
* Recoat using controlled passes.
For metal exposed to moisture, don’t ignore rust underneath the finish.
—
### Plastic
Plastic requires extra attention because its surface chemistry differs from wood and metal.
Don’t assume that sanding alone solves every adhesion issue.
The correct coating system may require plastic-specific paint or an adhesion-promoting primer.
If the existing orange-peel finish is also poorly bonded, determine whether you’re dealing with a texture problem, an adhesion problem, or both.
—
Furniture and Cabinets
Furniture makes orange peel especially noticeable because large flat surfaces reflect light.
A slightly textured finish that looks acceptable on a small decorative object can look obviously uneven across a cabinet door.
The best approach is to correct the entire visible panel rather than repeatedly spot-spraying individual areas.
For furniture-specific technique, see the site’s [guide to spray painting furniture without streaks](https://spraypainterguide.com/category/troubleshooting-fixes/).
For cabinets, use the same principle: smooth preparation, consistent spray distance, controlled coats, and sufficient curing.
—
How to Prevent Orange Peel
Fixing orange peel is useful, but preventing it is better.
Start With a Smooth Surface
Paint cannot magically remove deep scratches, dents, rough filler, or heavy texture.
High-gloss coatings are particularly unforgiving because they reflect light directly across the surface.
The site’s spray-paint selection guide notes that higher-gloss finishes make surface imperfections more visible.
Shake Aerosol Cans Thoroughly
Follow the manufacturer’s shaking instructions.
An incompletely mixed can may deliver inconsistent material.
Test Before Painting the Main Surface
Spray a small test area using the same:
* Paint
* Surface preparation
* Distance
* Temperature
* Technique
A test panel can reveal problems before you’ve committed to the entire project.
Maintain Consistent Distance
Don’t constantly move the can closer and farther away.
Keep it parallel to the surface and maintain a consistent working distance.
Keep Your Arm Moving
Start moving before activating the spray.
Release the spray before stopping your movement.
This helps prevent excessive material from accumulating at the beginning and end of each pass.
The same basic principle is emphasized in the site’s wall-spraying guide.
Overlap Your Passes Consistently
Uneven overlap creates variations in film thickness.
A consistent overlap helps create a uniform finish across the project.
Don’t Chase Gloss With Heavy Coats
If a surface doesn’t look glossy immediately, resist the temptation to flood it with paint.
More material doesn’t automatically mean a smoother finish.
—
## How to Apply Spray Paint Correctly
Step 1: Prepare
Clean the surface thoroughly.
Remove grease, wax, dirt, loose paint, and dust.
Repair dents and scratches before applying the final finish.
For difficult surfaces, choose a compatible primer or adhesion promoter.
Step 2: Clean and Set Up
Choose a clean, controlled work area.
Remove unnecessary dust and protect surrounding surfaces from overspray.
For outdoor work, avoid strong wind and direct sunlight.
For indoor work, provide appropriate ventilation and follow the product label.
The EPA recommends maximizing ventilation when using products that emit VOCs.
Step 3: Apply
Shake the aerosol thoroughly or prepare the spray gun according to the manufacturer’s instructions.
Hold the nozzle at a consistent distance.
Move smoothly across the surface.
Keep the can or gun perpendicular to the surface rather than angling it.
Apply controlled coats rather than trying to achieve complete coverage in one pass.
Step 4: Wait and Cure
Follow the manufacturer’s recoat instructions.
Don’t confuse touch-dry with fully cured.
Environmental conditions can change drying time, so don’t rely solely on a generic timer.
Step 5: Finish and Review
Inspect the surface under good lighting.
Look for:
* Orange peel
* Runs
* Dry spray
* Dust
* Fish eyes
* Uneven coverage
* Gloss variations
If the surface is good, allow it to cure fully.
If orange peel remains, determine whether another controlled coat or sanding/refinishing is appropriate.
—
Common Mistakes
Mistake 1: Sanding Too Early
Fresh paint may feel dry while remaining soft underneath.
Sanding prematurely can smear the coating and create more defects.
**Fix:** Follow the product’s curing instructions and test an inconspicuous area before aggressive sanding.
For broader troubleshooting, see Why Spray Paint Isn’t Sticking: 7 Easy Fixes.
Mistake 2: Spraying Another Heavy Coat
Adding more paint to orange peel usually makes the film thicker without correcting the underlying cause.
It can also create runs and extend curing time.
**Fix:** Correct the technique and use controlled coats.
Mistake 3: Ignoring the Environment
Painting in direct sun, excessive heat, cold, strong wind, or unsuitable humidity can dramatically change how paint behaves.
**Fix:** Choose conditions within the manufacturer’s recommended range.
The site’s outdoor painting guide specifically recommends working in shade to reduce premature drying and rough texture.
Mistake 4: Assuming Every Texture Problem Is Orange Peel
Bubbles, dry spray, overspray, fisheyes, and substrate texture can look similar from a distance.
**Fix:** Examine the surface closely before deciding on a repair method.
The site’s troubleshooting category includes separate guidance for bubbling and other common finish problems.
—
Expert Tips
Tip 1: Use Side Lighting
A strong light positioned at a shallow angle makes texture easier to see than overhead lighting.
Inspect the surface from multiple angles before deciding whether another coat is necessary.
Tip 2: Keep a Test Panel
Professional painters don’t have to guess how a coating will behave on every project.
A small test panel lets you evaluate:
* Spray distance
* Material flow
* Drying
* Gloss
* Color
* Texture
before committing to the entire project.
Tip 3: Fix the Cause, Not Just the Surface
Sanding removes the visible symptom.
It doesn’t fix poor atomization, incorrect temperature, excessive distance, improper reduction, or bad spraying technique.
If orange peel repeatedly returns, stop sanding and diagnose the application process.
Tip 4: Don’t Overvalue Speed
A professional-looking finish often takes longer because the painter spends more time preparing, testing, and allowing the coating to cure.
Rushing usually creates rework.
Tip 5: Treat High-Gloss Finishes Differently
The shinier the finish, the more obvious small defects become.
If you want a mirror-like result, surface preparation becomes just as important as spraying technique.
—
Final Verdict
**Spray paint orange peel is usually fixable.**
For mild texture, the solution is often straightforward: let the coating cure properly, lightly sand the surface, remove the dust, and apply another controlled coat.
For severe orange peel, sand the affected surface more thoroughly and refinish the panel rather than repeatedly spraying over the texture.
The most important lesson is that orange peel is rarely caused by one single mistake. It is usually the result of several variables interacting: spray distance, movement speed, material flow, temperature, surface preparation, and drying conditions.
For the best chance of a smooth finish:
1. Prepare the surface properly.
2. Use compatible paint and primer.
3. Test before committing.
4. Maintain a consistent spray distance.
5. Keep the spray moving.
6. Apply controlled coats.
7. Respect the manufacturer’s recoat and cure times.
8. Control temperature, humidity, sunlight, and airflow.
9. Inspect before applying additional material.
A smooth finish isn’t about spraying more paint.
**It’s about controlling what happens between the nozzle and the surface.**
—
# Frequently Asked Questions
1. Can I fix spray paint orange peel without stripping the paint?
Yes. If the existing coating is well bonded and the orange peel isn’t severe, you can often allow it to cure, sand the surface smooth, remove the dust, and apply another properly controlled coat.
Complete stripping is more appropriate when the existing paint is peeling, incompatible, badly contaminated, or severely defective. If the problem is only texture, stripping everything may create unnecessary work.
—
2. How long should I wait before sanding orange peel?
There is no universal sanding time because different paints cure at different rates.
Always follow the product label rather than relying on a generic number of hours. Touch-dry does not necessarily mean fully cured.
Temperature, humidity, film thickness, and ventilation can also affect curing.
If the sandpaper gums up or the coating feels soft, stop and allow additional curing time.
—
3. What grit sandpaper should I use for orange peel?
The correct abrasive depends on the severity of the texture and the coating system.
For mild orange peel, begin conservatively with a fine abrasive rather than immediately using an aggressive grit.
For severe defects, a coarser starting abrasive may be necessary, followed by progressively finer abrasives before refinishing.
The goal is to remove texture without unnecessarily removing the entire coating.
—
4. Why does my spray paint look rough instead of smooth?
A rough finish can have several causes.
Common possibilities include spraying too far away, allowing the droplets to partially dry before reaching the surface, incorrect atomization, unsuitable temperature, excessive airflow, or inadequate coating flow.
The site’s technique guide identifies spray technique as a major factor in achieving a professional finish.
—
5. Does spraying too far away cause orange peel?
Yes. Spraying too far away can cause the droplets to lose solvent before reaching the surface.
The paint may then land as partially dried material that doesn’t flow together properly.
For many spray applications, approximately 10–12 inches is a useful starting point, but always follow the paint or equipment manufacturer’s instructions.
—
6. Does humidity cause spray paint orange peel?
Humidity can affect drying and curing, but the exact effect depends on the paint formulation and environmental conditions.
Rather than assuming that high or low humidity is always responsible, check the product’s recommended application conditions.
If your finish changes dramatically on different days, record temperature, humidity, and technique. That can help identify the environmental variable responsible.
—
7. Can I spray another coat over orange peel?
You can, but spraying another coat directly over severe orange peel usually doesn’t solve the problem.
The new coating may simply follow the existing texture.
For mild defects, another properly applied coat may improve the appearance if the underlying surface can level sufficiently.
For significant texture, sanding first is generally the better approach.
—
8. Why does spray paint orange peel happen on my car?
Automotive panels are particularly sensitive to surface preparation, spray technique, temperature, airflow, and paint-system compatibility.
Direct sunlight can cause the surface to heat and solvents to evaporate too quickly.
The site’s car painting guide specifically warns that direct sunlight can contribute to orange peel.
For serious automotive refinishing, follow the coating manufacturer’s technical specifications rather than relying on general aerosol-paint rules.
—
9. Is orange peel caused by bad spray paint?
Not necessarily.
A high-quality paint can produce orange peel when applied incorrectly.
Conversely, a suitable coating can produce an excellent finish when the surface is prepared correctly and the application conditions are controlled.
Paint quality matters, but technique and environmental conditions matter too.
—
10. How do I prevent orange peel when using a spray can?
Shake the can thoroughly according to the label, use the recommended spray distance, keep the can moving at a consistent speed, maintain consistent overlap, and avoid applying excessively heavy coats.
Work within the manufacturer’s temperature recommendations and avoid direct sunlight and strong wind.
A test spray on scrap material is one of the easiest ways to confirm your technique before painting the actual project.
—
11. Is orange peel the same as dry spray?
No.
They can look similar, but they are not necessarily the same defect.
**Orange peel** generally describes a textured, dimpled surface where the coating has not leveled properly.
**Dry spray** often appears more powdery or rough because droplets have partially dried before or as they reach the surface.
Spraying too far away can contribute to dry spray and a rough finish.
—
12. Do I need a respirator when fixing spray paint orange peel?
Spray-paint safety depends on the product, environment, and exposure.
Do not treat a basic dust mask as automatically adequate protection against paint vapors.
Use the protective equipment specified by the product’s safety information and provide appropriate ventilation.
The EPA recommends increasing ventilation when using products that emit VOCs, while OSHA’s spray-operation guidance addresses ventilation and respiratory protection for spray-finishing environments.
Never spray near flames, ignition sources, or in an inadequately ventilated enclosed space.
—
13. Should I wet sand orange peel?
Wet sanding can be useful for appropriate cured coating systems because it can reduce airborne sanding dust and provide controlled abrasion.
However, not every coating, substrate, or situation should automatically be wet sanded.
Follow the paint manufacturer’s recommendations and make sure the substrate won’t be damaged by water.
For delicate materials or fresh coatings, dry sanding with suitable dust control may be more appropriate.
—
14. Why does my first coat look smooth but the second coat develops orange peel?
The second coat may be applied differently from the first.
Common reasons include:
* Applying the second coat too heavily
* Changing spray distance
* Changing movement speed
* Spraying outside the recommended recoat window
* Increasing temperature during the session
* Allowing the first coat to dry differently
Compare your technique between coats instead of assuming the paint suddenly changed.
—
15. What is the best way to get a glass-smooth spray paint finish?
Start before you ever pull the trigger.
A glass-smooth finish requires a properly prepared substrate, compatible primer and paint, controlled spray technique, suitable environmental conditions, correct drying time, and careful final inspection.
Don’t try to compensate for poor preparation by applying thicker coats.
The smoother the substrate and more controlled the application, the easier it is for the coating to produce a professional-looking finish.