Mastering the Aerosol-to-Canvas Interface: Why Technique Trumps Brand Choice
You buy a canvas, grab a can that says “acrylic,” and start spraying… then the problems show up fast: fuzzy texture, speckled coverage, drips that crater, and worst of all a finish that looks cheap instead of intentional. If you’re making art to hang, sell, or gift (or even painting décor for things like trending charcuterie board accessories displays and party setups), that first “meh” result is costly: wasted canvases, wasted paint, and the feeling that spray paint “just isn’t for real art.”
Here’s the real issue: beginners don’t fail because they lack talent, they fail because canvas is a porous, springy substrate and spray paint is a high-speed delivery system. When you don’t match the paint chemistry + nozzle behavior to the way canvas absorbs binder, you get avoidable defects.
This pillar post gives you the path to mastery: how to choose the best acrylic spray paint for canvas art beginners (and why), plus the “trade secrets” that prevent 90% of rookie mistakes.
First Principles: What “Acrylic Spray Paint” Really Is (and why canvas reacts the way it does)
“Acrylic spray paint” isn’t a single thing. It’s a system: pigment + acrylic binder (resin) + solvent/water + additives + propellant, delivered through an aerosol valve that atomizes the liquid into droplets.
The physics of atomization (why your canvas gets speckled)
When you press the nozzle, the propellant forces paint through a tiny orifice. That converts a continuous liquid stream into a spray plume of droplets. Droplet size + velocity determines whether you get:
- Smooth films (droplets stay wet long enough to merge)
- Dry spray / sandpaper texture (droplets partially dry mid-air)
- Spatter (inconsistent flow due to clogged tip, low can pressure, or poor mixing)
Canvas amplifies these issues because it’s not flat metal or sealed plastic, it’s a woven fabric with “valleys” that catch dry droplets and “peaks” that get hit first.
Acrylic film formation (the molecular “why”)
In acrylic paints, the binder forms a film when the carrier evaporates and the polymer particles coalesce into a continuous layer. If the paint hits too dry, coalescence is incomplete and you get a dusty, weak surface. If it hits too wet, it pools into canvas weave and creates low spots and drips.
Why canvas behaves differently than paper or wood
Most canvases are primed with gesso, but beginner canvases vary wildly in:
- absorbency
- tooth
- fabric tension
- primer thickness
Acrylic sprays can soak into under-primed canvas and leave you with a dull, uneven look. That’s why “best” for beginners isn’t only about brand, it’s about forgiveness under imperfect technique.
The Technical Deep-Dive: “Wet Edge Management”
If you only learn one advanced concept, make it this: wet edge management.
Think of spray paint as laying down thousands of micro-droplets that must land, spread, and merge before they flash-dry. Your goal is to keep a thin, consistent wet edge moving across the surface so each pass bonds into the last.
A veteran’s analogy
A 15-year finisher would explain it like this:
“You’re not ‘coloring’ the canvas, you’re building a film. Treat each pass like laying shingles on a roof. Overlap consistently, don’t double-load one spot, and never chase imperfections while it’s wet.”
The three invisible timers that control your result
- Flash time: how fast the surface stops looking wet
- Open time: how long droplets can still merge smoothly
- Recoat window: when a fresh layer bonds best without wrinkling or lifting
Beginner failure point: they spray, see a light area, and immediately “fix it” by hovering. That creates localized over-application, which causes drips and weird sheen patches.
What “Best” Means for Beginners
Most lists rank paints by color selection or popularity. That’s not what beginners need.
The best acrylic spray paint for canvas art beginners is the one that:
- has predictable atomization
- dries matte or low-sheen (hides unevenness)
- has strong pigment load (coverage without flooding)
- is low-odor / studio-friendly if you’re working indoors (with proper ventilation)
Two categories you should understand before buying
1) Fine art acrylic sprays (beginner-friendly for studios)
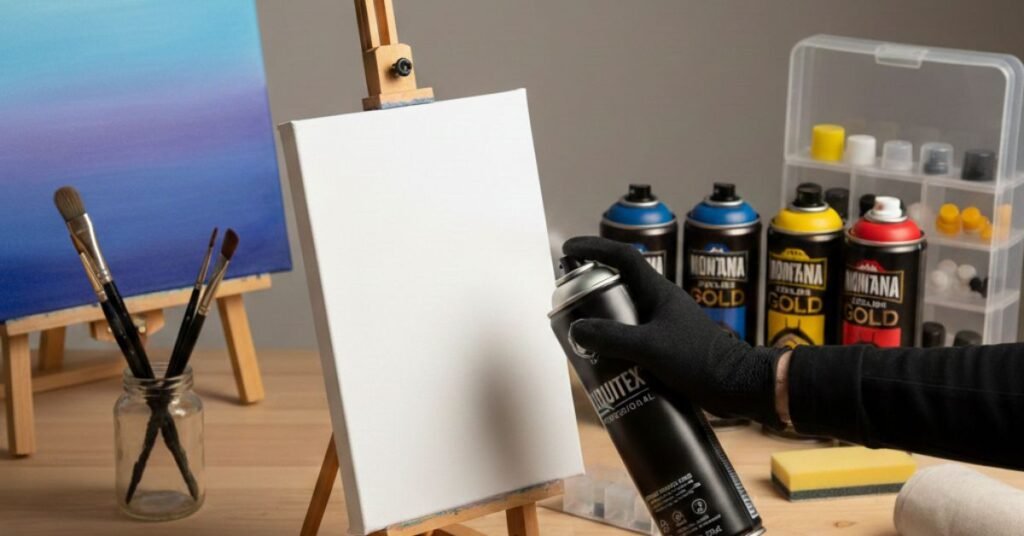
Liquitex positions its Professional Spray Paint as water-based, low odor, matte, and made with fine art pigments specifically aimed at artists working in studio contexts.
This category tends to be more forgiving on canvas because it’s formulated for art surfaces and controlled application.
2) General “acrylic” rattle cans (work, but less forgiving)
Many hardware-store acrylic aerosols are great on wood/metal, but on canvas they can:
- dry too fast (dry spray)
- create harsh sheen differences
- feel “plasticky” if over-applied
They can still work especially for backgrounds and bold shapes if your prep and technique are solid.
Best Acrylic Spray Paint for Canvas Art Beginners: The Picks (with the real “why”)
I’m not going to dump a generic top 10. Here are the most reliable beginner pathways based on how canvas behaves.
Option A: The “studio-safe” beginner pick
Liquitex Professional Spray Paint
Why it wins for beginners: Liquitex explicitly markets this spray as water-based, low odor, matte, and fine art pigment-based, which aligns with what beginners struggle with most: harsh smell, inconsistent sheen, and muddy color.
Best use:
- gradients
- backgrounds
- stencil layers
- painterly layers where you want a matte fine-art look
Option B: The “street-to-studio” artist can (huge color range)
Montana GOLD (artist spray line)
Montana GOLD is widely used by artists; Montana Cans’ help center even discusses technical behavior like drips from spraying too close or too slowly, and recommends allowing layers to cure before painting over with acrylic media.
It’s a strong choice when you want intense color control and lots of cap options (caps matter more than most beginners realize).
Best use:
- crisp shapes
- layering
- large canvases
- bold, graphic work
Option C: The budget “practice can” (for fundamentals)
A general-purpose acrylic spray (used intentionally)
If you’re learning distance, overlap, and speed, an affordable acrylic can is fine as long as you accept you’re buying practice. Pair it with proper priming and you can still get good art, but it’s less forgiving.
Best use:
- practice boards
- underlayers
- quick studies
The “Trade Secret” Lens: Failure points beginners don’t see (and how pros prevent them)
Golden Nugget #1: Canvas fuzz is a prep issue, not a paint issue
Cheap canvas often has micro-fibers that lift when hit with wet coats. Pros avoid that by:
- adding one extra gesso coat
- lightly sanding the gesso with very fine grit (or a finishing pad)
- sealing the weave so paint sits on top
Golden Nugget #2: Your first coat should look “wrong”
Beginners try to make the first pass look perfect. Pros do the opposite:
- First coat = a dry, thin “grip” coat
- Second and third coats build color smoothly without flooding the weave
Golden Nugget #3: The can temperature controls droplet behavior
Cold can = poor atomization = spatter.
A slightly warmed can spray more consistently. Don’t use extreme heat, just let it reach a comfortable room temperature.
Golden Nugget #4: Caps are the hidden upgrade
Artists treat caps like brush shapes:
- skinny cap for detail
- medium cap for fills
- soft cap for fades
If your paint line supports cap swapping, you can solve “speckle” and “uneven fills” without changing brands.
Rules of the Game: Safety, compliance, and professional standards
Spray painting is simple until you ignore the hazards.
Ventilation and respiratory protection
Even “low odor” sprays still produce airborne particulates and vapors. Work in:
- strong ventilation (cross-breeze or extraction)
- a spray booth if possible
- outdoors when practical
Use appropriate respiratory protection when needed. Always read the label and SDS for the product you’re using.
Fire and propellant reality
Many aerosol paints use flammable propellants. Treat spraying like working with a flame source nearby:
- no smoking
- no open flames
- avoid spraying near heaters or pilot lights
Art material labeling: ASTM D4236 awareness
ASTM D4236 is a standard practice for labeling art materials for chronic health hazards.
For beginner artists, the takeaway is simple: choose products that are clearly labeled and follow all warnings especially if you’re working in a home studio or around kids.
How to Use Acrylic Spray Paint on Canvas
1) Prep the canvas like a pro
- Start with a pre-primed canvas, but assume it needs help
- Add 1 thin coat of gesso if the surface feels overly absorbent
- Let dry fully
- Optional: lightly sand the gesso for smoother blends
2) Set your spray environment
- Dust-free area
- Canvas vertical (easel) for even passes, or horizontal for heavy fills
- Drop cloth behind to see overspray
3) The correct spray fundamentals (non-negotiable)
Distance
Most cans perform best around 8–10 inches away (many product instructions fall in this range; for example Krylon documents commonly specify holding the can 8–10 inches from the surface).
Speed
Keep your hand moving. Start spraying off the canvas, pass across, stop spraying off the canvas.
Overlap
Overlap each pass about 50% so the film builds evenly.
4) Layering strategy (how to avoid drips and dull patches)
- Coat 1: thin “grip” coat
- Coat 2: build color
- Coat 3+: refine depth, adjust gradients
5) Dry time and curing
Don’t rush it. Let layers set before reworking. If you plan to add brush acrylics over spray, follow guidance about allowing layers to cure; Montana notes it’s optimal for layers to be cured before painting over with acrylic-based paints or markers.
Finishing: protecting your canvas without ruining the look
Beginners often destroy good work with the wrong topcoat.
The safe finishing logic
- If you want to protect the surface, use an acrylic clear designed to be non-yellowing.
- Test first, because some clears can shift sheen or deepen darks.
Krylon’s COLORmaxx Acrylic Crystal Clear is described as a protective, non-yellowing finish usable on multiple surfaces.
Whether or not it’s your final choice, the key is choosing a compatible acrylic clear and applying it in light coats.
FAQ
1) Is water-based acrylic spray paint actually better for beginners than solvent-based?
Often yes especially in small studios because water-based, low-odor formulas are typically engineered for controlled application and a matte art finish. Liquitex markets its spray as water-based, low odor, and matte, built around fine art pigments, which aligns with beginner needs.
That said, “better” depends on your goal. Solvent-based artist sprays can offer faster dry times and certain surface behaviors that are fantastic for crisp edges and layering. The tradeoff is they punish heavy-handed technique more severely, and ventilation demands rise.
2) Why does my spray paint look dusty or gritty on canvas?
That’s usually dry spray droplets partially drying before they land. Causes include spraying too far away, spraying in hot/dry conditions, or using a can that atomizes coarsely due to low pressure or temperature.
Fix it by tightening fundamentals: spray closer within the recommended distance band (often around 8–10 inches for many aerosols), keep passes moving, and build thin coats. Also ensure the can is shaken thoroughly and at a stable room temperature.
3) Can I combine acrylic spray paint with brush acrylics on the same canvas?
Yes, but your timing matters. If you paint over a spray layer before it’s properly cured, you risk poor bonding, smearing, or unexpected surface drag. Montana specifically notes it’s optimal for layers to be cured before painting over with acrylic-based tube paints or markers.
A practical workflow is: spray background → let cure → brush details → let dry → clear coat (optional). Always test on a scrap canvas first if you’re mixing brands or finishes.
4) Do I need to seal the canvas before spray painting?
If the canvas is high quality and well-primed, you can spray directly. But beginner canvases often absorb binder unevenly, which causes dull patches and weak saturation. One additional gesso coat can dramatically improve consistency.
Sealing isn’t about “being fancy.” It’s about controlling absorbency so your spray droplets form a uniform film rather than soaking into the weave.
5) What sheen is best for beginner canvas spray art: matte, satin, or gloss?
Matte is usually most forgiving because it hides overlap differences and minor texture. That’s one reason Liquitex highlights matte color in its positioning.
Gloss can look incredible for certain styles, but it magnifies mistakes: uneven passes become visible as streaks and hot spots. Satin is a balanced middle ground if you want richer depth without full gloss drama.
6) How do I stop bleeding under stencils on canvas?
Bleeding happens when paint gets under the stencil edge, usually due to heavy coats or a stencil that isn’t fully adhered to the weave texture. Canvas texture is the enemy of crisp edges.
Use the pro method: light tack coat first, let it set, then build color in two or three light coats. Also press the stencil down firmly and consider using a lower-output cap for controlled application.
7) Is it safe to spray paint canvases indoors if the can says “low odor”?
Low odor does not mean no airborne risk. Even artist sprays produce particulates and vapors. Treat indoor spraying as a controlled activity: ventilation, distance from living areas, and appropriate PPE.
Also pay attention to labeling and standards. ASTM D4236 covers labeling for chronic health hazards in art materials, which is a reminder to follow warnings and safe-use instructions seriously.
8) What’s the biggest beginner mistake when choosing “the best acrylic spray paint for canvas”?
Buying based on color alone. Beginners should buy based on behavior: atomization, finish forgiveness, and how it performs on porous substrates. A paint that’s perfect on metal can look rough on canvas if it dries too fast or sprays too dry.
Choose a paint engineered for art surfaces when possible (Liquitex explicitly positions its spray for studio-friendly fine art use). Then lock in technique: distance, overlap, light coats, and cure time.
Final Verdict: The strategic path forward
If you want the best acrylic spray paint for canvas art beginners, stop thinking in brand hype and start thinking in systems:
- Pick a forgiving, art-oriented acrylic spray when possible (Liquitex is purpose-positioned as water-based, low odor, matte, fine art pigment spray).
- Control the substrate: a properly primed canvas is half the result.
- Master wet edge management: light coats, consistent overlap, correct distance.
- Respect curing before layering brush acrylics or sealing (Montana recommends letting layers cure before painting over with acrylic paints/markers).
- Finish intelligently with a compatible acrylic clear if protection is needed (non-yellowing acrylic clears are commonly positioned for protective finishing).
Do that, and you’ll get a finish that looks like deliberate smooth fades, crisp shapes, and color that reads “artist,” not “craft accident.”